Hi Everyone,
We are back to Wednesday again and I'm not sure I like how fast this year seems to be going! I doubt it will slow down though!
Wednesday means a new challenge at Fab'n'Funky Challenges but it also means that the winners and Top 3 from last week have been chosen. All the details can be found over at on the F'n'F blog.
We have our blogging Mama as our host this week - the fabulous Judith. I love the theme this week as it it totally me! So without further ado our theme is...
One for the Girls
Just make a female-themed project and link it up - couldn't be simpler! We have two sponsors this week too. My Creative Classroom and StampArt Design by Kathryne. Two sponsors means two winners so let's get crafting!
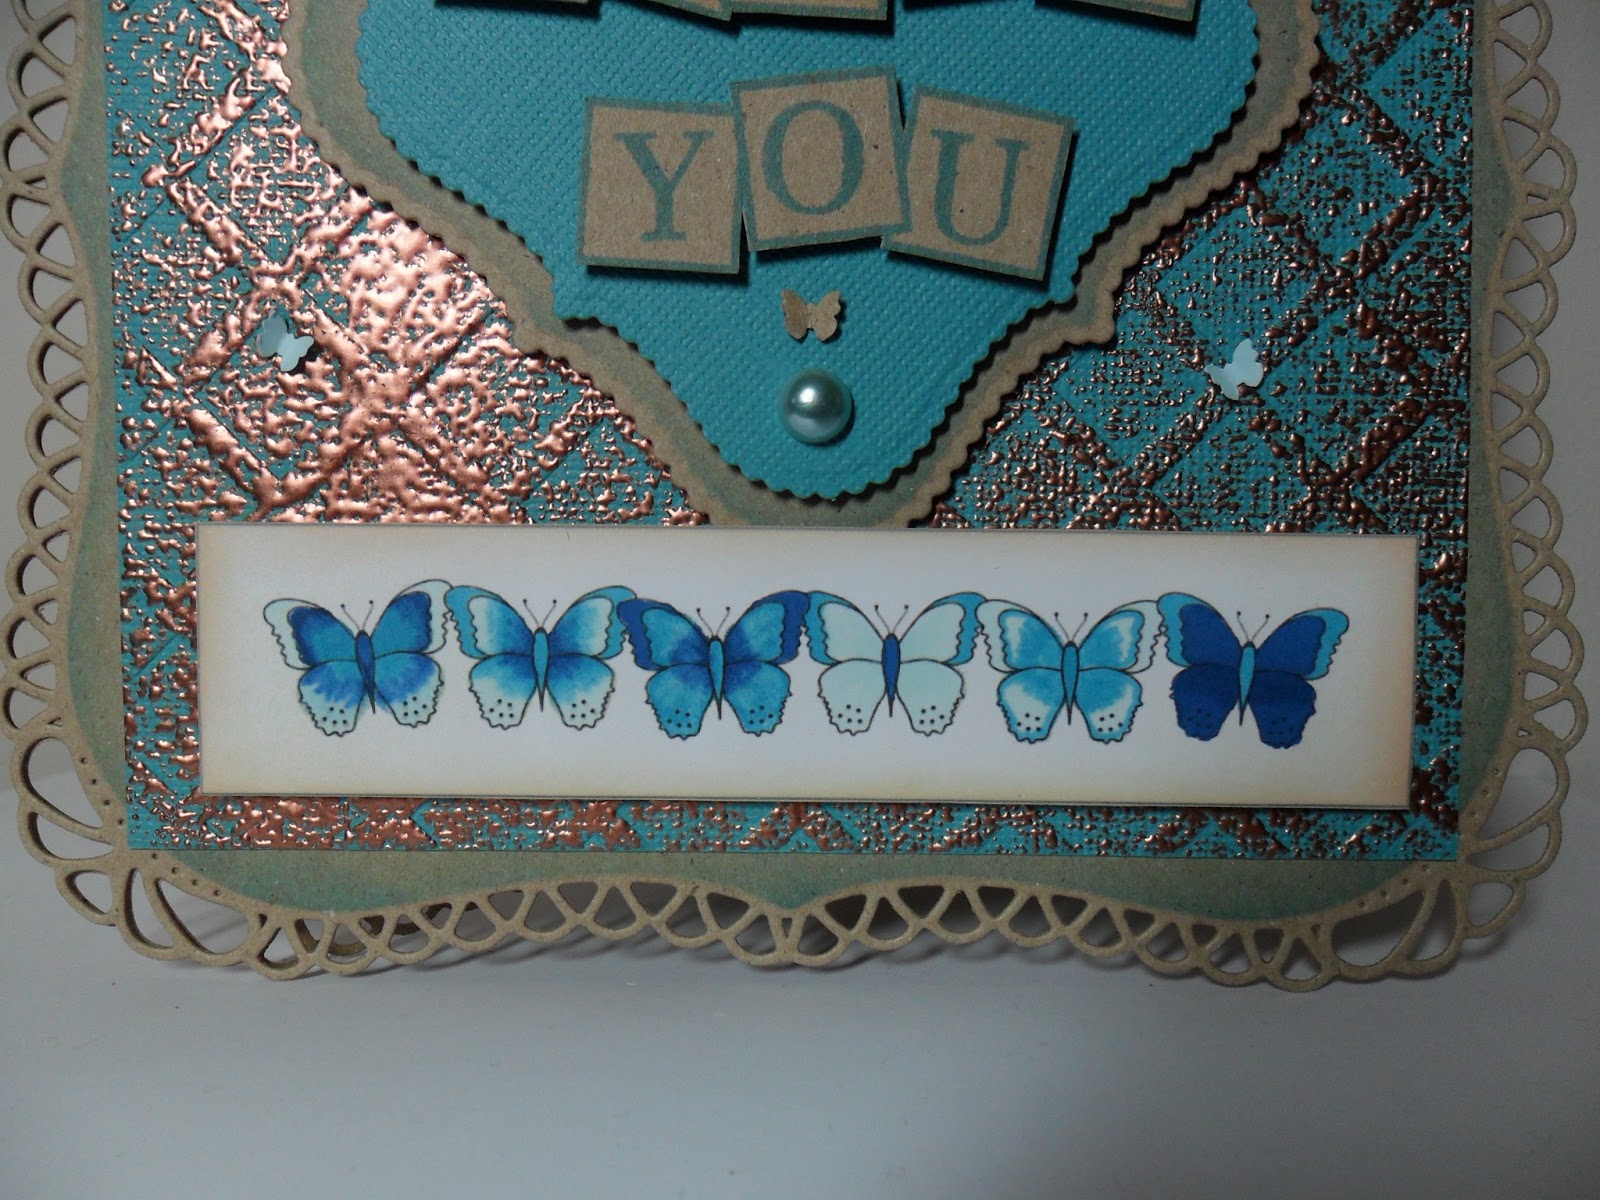
This is my card for the challenge - the girly elements are the butterflies, pearls and decorative edging.
I used a StampArt Design by Kathryne image for my card called Butterfly Border 1 and coloured with FlexMarkers in Aquamarine, Surf Blue and Navy Blue. I inked the edge with Tim Holtz Distress ink in Antique Linen for an aged effect.
My base card was made from two of the Spellbinders Grand Decorative Labels One cut in kraft card. I attached with the super stick red liner tape. While still in the die I inked through with Tim Holtz Distress Ink in Broken China. My main background was made with Coredinations cardstock. I embossed using the lattice Embossalicious folder from Crafter's Companion and then lightly brushed a Versamark inkpad over the top. I added Debbi Moore's metal magic and heated from behind with a heat tool. I really like the effect that this has created.

My sentiment topper was created with Spellbinders Scalloped Labels One in kraft and Coredinations. Using Claritystamp's Letterbox Alphabet set and Broken China Distress Ink I made the sentiment as I wanted. The squares come as triple, double and single boxes so I after stamped the triple box, I masked it off and then used the double box stamp to create a five letter space for my wording. Claritystamps really are the best quality I've ever had the pleasure to use. My tiny butterflies were punched using a Tonic punch and I just coloured a piece of super smooth paper with the Aquamarine FlexMarker to get the perfect match. The pearls came free from Create and Craft a while back.
I really hope to see you join us for our girly challenge this week.
Happy crafting,
Rachel x
I'd like to enter this card into the following challenge:-
Shelly's Images - Show Us What You Got
Happy Saturday Everyone!
I have a new crafty cupboard courtesy of Storage 4 Crafts and this morning it was an absolute pleasure to make my first card with a place for everything and everything in its place! I think I may even turn into a tidy crafter - shock horror!
I saw that the latest challenge over at the Tiddly Inks challenge blog was to use a Wryn image and being a huge fan, I decided to give it a go. It's also Saturday and that means a new sketch over at the Sketch Saturday blog. I love their ideas and this one was no different...
I think this sketch will be so useful for a whole variety of cards. So I'm sure you'd like to see my card by now! I'll not keep you in suspense any longer!
Isn't this image just adorable?! It's called Bugs and Kisses! I started with a 5.25" kraft card blank and then layered up a piece of Me To You red dotty paper which came free with a magazine. I thought the jaunty angle might add an extra dimension so squint it was! I took a piece of Dawn Bibby paper and chopped the silver bubble border off to give me a purple stripey layer. My ribbon is from DoCrafts and I've had it for ages.
I coloured my image with ProMarkers in Cinnamon, Vanilla, Dusky Pink, Blush, Ruby, Lipstick Red, Spring Lilac, Lilac, Henna, Cocoa, Caramel, Cool Grey 1, Yellow, Marsh Green and I also used the blender pen on the little hedgehog. My flowers are from Wild Orchid Crafts and I really love them.
I'd like to enter this card into the following challenges:
Sketch Saturday - #260
Tiddly Inks Challenge Blog #110 - Use a Wryn
Thanks for stopping by today.
Happy crafting,
Rachel x
Hi All,
What a glorious morning! Until I hung out the washing! Story of my life! I hope you are all well and enjoying some crafty time this week.
We have a great new challenge over at the Fab'n'Funky Challenges blog but first the winner and Top 3 from last week have been posted. Head on over to the blog to see our lucky winners.
Now, on to this week's challenge and we have the wonderful Vicky as our host. She has chosen a great theme and I'm sure you'll all be eager to join in. Our theme this week is...
Ribbon and Lace
You can add ribbon or lace or both to your project and then link it up to be in with a chance of a prize or Top 3 position. Our sponsors this week are Doodle Pantry and StampArt Design by Kathryne. Just click on their names to view the brilliant range of images.
I used a Doodle Pantry image for my card this week. It's called Pitcher and Basin and can be found here.
I saw a similar design in a magazine and thought I'd have a go myself. I started with an A4 piece of kraft card and cut it length-ways and then scored each piece in half to make two 6" x 4" card blanks. I used my Tonic guillotine to cut the fronts on the diagonal. I attached the two blanks together the Collall All Purpose Glue. It really is the best glue in the world!
The image came with two patterned backing papers but I made the plain blue paper by using the colour picker feature in My Craft Studio. I used the flowery backing paper to cover the fronts of my card and then added a piece of kraft cardstock that had been embossed with one of the A4 Sue Wilson embossing folders from Creative Expressions.
My image was cut using Spellbinders Grand Labels Eleven. I added the lace to close the card and also for an extra girly finish.
I hope you can join us for our ribbon/lace challenge this week.
Happy crafting,
Rachel x
Good Morning,
I hope this Wednesday morning finds you all well with lovely creations just waiting to be made. Thank you to everyone who joined in for our beady challenge last week. You really showed how beads can be a great addition to any crafty stash. The winner and Top 3 have been posted on the Fab'n'Funky Challenges blog, so why not head on over for a peek!
So I'm sure you are all waiting to find out our current challenge and boy do we have a great one for you this week. The amazing Pat K is our host and the theme is...
Favourite Embellishment
So simple - just add your favourite embellishment to your project and tell us about it! I'm sure this is going to be a popular challenge!
We have a fantastic new sponsor - Dilly Beans. Their images are really quirky but so useable. The DT were so lucky to be able to work with some brilliant images and you can see all our work on the Fab'nFunky Challenges blog.
Now without further ado, here is my card...
I started with a 6" square scalloped card blank and made a background using a piece of silver mirriboard. I embossed using one of the new Cuttlebug embossing folders and then used my Adirondack and Pinflair alcohol inks to add the colours of the rainbow. As soon as I saw this image on the Dilly Beans site, I immediately thought rainbow colours!
My image is called Daisy Framed Girl and is available here. I coloured her with ProMarkers in Ruby, Lipstick Red, Bright Orange, Gold, Canary, Yellow, Forest Green, Grass, True Blue, Cobolt Blue, Plum Preserve and Amethyst. Once I had finished colouring the flowers, I didn't want to spoil the rest so I've left her black and white. I really need to get more confidence with my colouring techniques. I do have another idea in mind for this image so watch this space!
I used a corner rounder to chomp the corners of my background and black layer. I added my favourite embellishment - gems - to the centre of each of the flowers. But of course my card wouldn't be complete without a butterfly so added one to the inside...
I used the same technique as the background to make my butterfly but used bigger drops of the alcohol inks. I cut out using Spellbinders Wonderful Wings and layered with black card again. My frame was doodled with a Micron pen. Totally out of my comfort zone but I think that's a good thing, now and again!
I hope you can join us with your favourite embellishments. Don't forget to tell us why you love them so much.
Happy crafting,
Rachel x
Hello All,
I hope you are all well and carrying on crafting! We had a morning of glorious sunshine yesterday and then as soon as I put my washing out, the mist came down! Typical!
Fab'n'Funky Challenges are back with another challenge for you but first why not head over to the blog to see our random winners and Top 4 from last week. We were all pinked out!
I'm your host this week and I've gone slightly out of the box with my theme...
Use Beads
You can use beads in any way you like and there is wonderful inspiration from my teamies on the Fab'n'Funky Challenges blog. They have really done me proud this week.
We have the brilliant Digi Darla Designs as our sponsor. Click here to view their amazing artwork. The DT were so lucky to be able to work with Digi Darla Designs images this week and I chose to use Dandelion Spray.
I'm really pleased with how my card turned out and it is winging it's way to Comrie in Perthshire for my aunty's birthday. I really hope she doesn't pop in for a look before it arrives!
I started by making a Spellbinders Grand Labels Twenty Three shaped card blank and then cut a piece of the Teresa Collins Fabrications teal paper using the same die, making an aperture using one of the smaller dies of the same shape. I took a piece of co-ordinating paper from the same kit and covered with a double sided sticky sheet. I then attached microbeads all over. This is the first time I've used microbeads and I think they are really cool.
I printed my digi using Super Smooth Decoupage paper and cut again with Spellbinders Grand Labels Twenty Three. I used a Quickie Glue Pen and MCS glitter for the flower heads. My beads in the centre were recycled from old jewellery and I attached with Cosmic Shimmer dries clear glue.
Finally I added my bow using silky crush ribbon and a piece of recycled satin ribbon, topping with a Creative Expressions dazzler.
Once I had made my card, I started on the box for that added wow factor! I used Centura Pearl cardstock and made a box using the Boxer board with the Crafter's Companion Ultimate Pro. Using the leftover piece from the frame of the card, I made a topper for my box. The sentiment was computer generated and finshed off with some more ribbon.
This is a photo that I took on my phone without my Ottlite on and was just astounded by the microbeads!
Thanks for stopping by today. I really hope you can join us for our beading challenge.
Happy crafting,
Rachel x
I would like to enter this card into the following challenges:-
Creative Card Crew #35 - Bling
Let's Craft and Create #69 - One for the Girls
Whimsical Designs - Bling it Out
Designs by Lisa Somerville - A Female Touch
Allsorts #205 - Add Some Sparkle
Deep Ocean Challenge Blog #51 - Sparkle
The ABC Challenge Blog - M for Make it Sparkle
Hi Everyone,
I can't believe we are back to Wednesday again! Where are these weeks going? - maybe it's just a sign I'm getting older! I hope you've all had plenty of crafty time over the last few days. I seriously need to get my crafty stash in order as it is slowly taking over my house!
Thank you to everybody who entered our challenge last week. We really felt the love! If you would like to check out the winner and Top 3, head over to the Fab'n'Funky Challenges blog now.
Our challenge this week is one that filled me with glee when I saw it! The brilliant Wendy is our host and I'm sure many of you know I'm partial to some pink on my cards and the theme this week is...
LOTS of Pink
That's right - just use plenty of pink on your project and link it up. I had so much fun deciding how to incorprate the pinks into my card.
We also have two great sponsors this week - Lili of the Valley and StampArt Design by Kathryne. I used a LOTV image called Garden of Wishes and it's the first time I've inked her up...
I started with a 6" square scalloped card blank and then added a piece of star embossed card that I had inked with Tim Holtz Distress Ink in Picked Raspberry (my favourite DI colour). My plain card is piece of Coredinations cardstock and I added three gems to the top right corner. I bought the ribbon from The Ribbon Kings at the SECC craft fair last year and I love the shimmer it gives.
I coloured my image with ProMarkers in Satin, Blush, Sunkissed Pink, Vanilla, Pineapple Crush, Soft Green, Cerise, Pink Lobster and Pink Mittens. To cut my image I used Spellbinders Labels H and then stenciled through the die with the same DI. I added glitter with a Quickie Glue Pen. The pink glitter was from Lakeland who used to have a craft range. The clear glitter was from My Craft Studio. I attached my topper with foam pads to give dimension.
I really hope you can join us for our Pink extravaganza this week.
Happy crafting,
Rachel x