Followers

Showing posts with label Flexmarkers. Show all posts

Wednesday, 29 May 2013

Fab'n'Funky Challenges #173 - One for the Girls

Hi Everyone,

We are back to Wednesday again and I'm not sure I like how fast this year seems to be going!  I doubt it will slow down though!

Wednesday means a new challenge at Fab'n'Funky Challenges but it also means that the winners and Top 3 from last week have been chosen.  All the details can be found over at on the F'n'F blog.

We have our blogging Mama as our host this week - the fabulous Judith.  I love the theme this week as it it totally me!  So without further ado our theme is...


One for the Girls

Just make a female-themed project and link it up - couldn't be simpler!  We have two sponsors this week too.  My Creative Classroom and StampArt Design by Kathryne.  Two sponsors means two winners so let's get crafting!  

This is my card for the challenge - the girly elements are the butterflies, pearls and decorative edging.  


I used a StampArt Design by Kathryne image for my card called Butterfly Border 1 and coloured with FlexMarkers in Aquamarine, Surf Blue and Navy Blue.  I inked the edge with Tim Holtz Distress ink in Antique Linen for an aged effect.
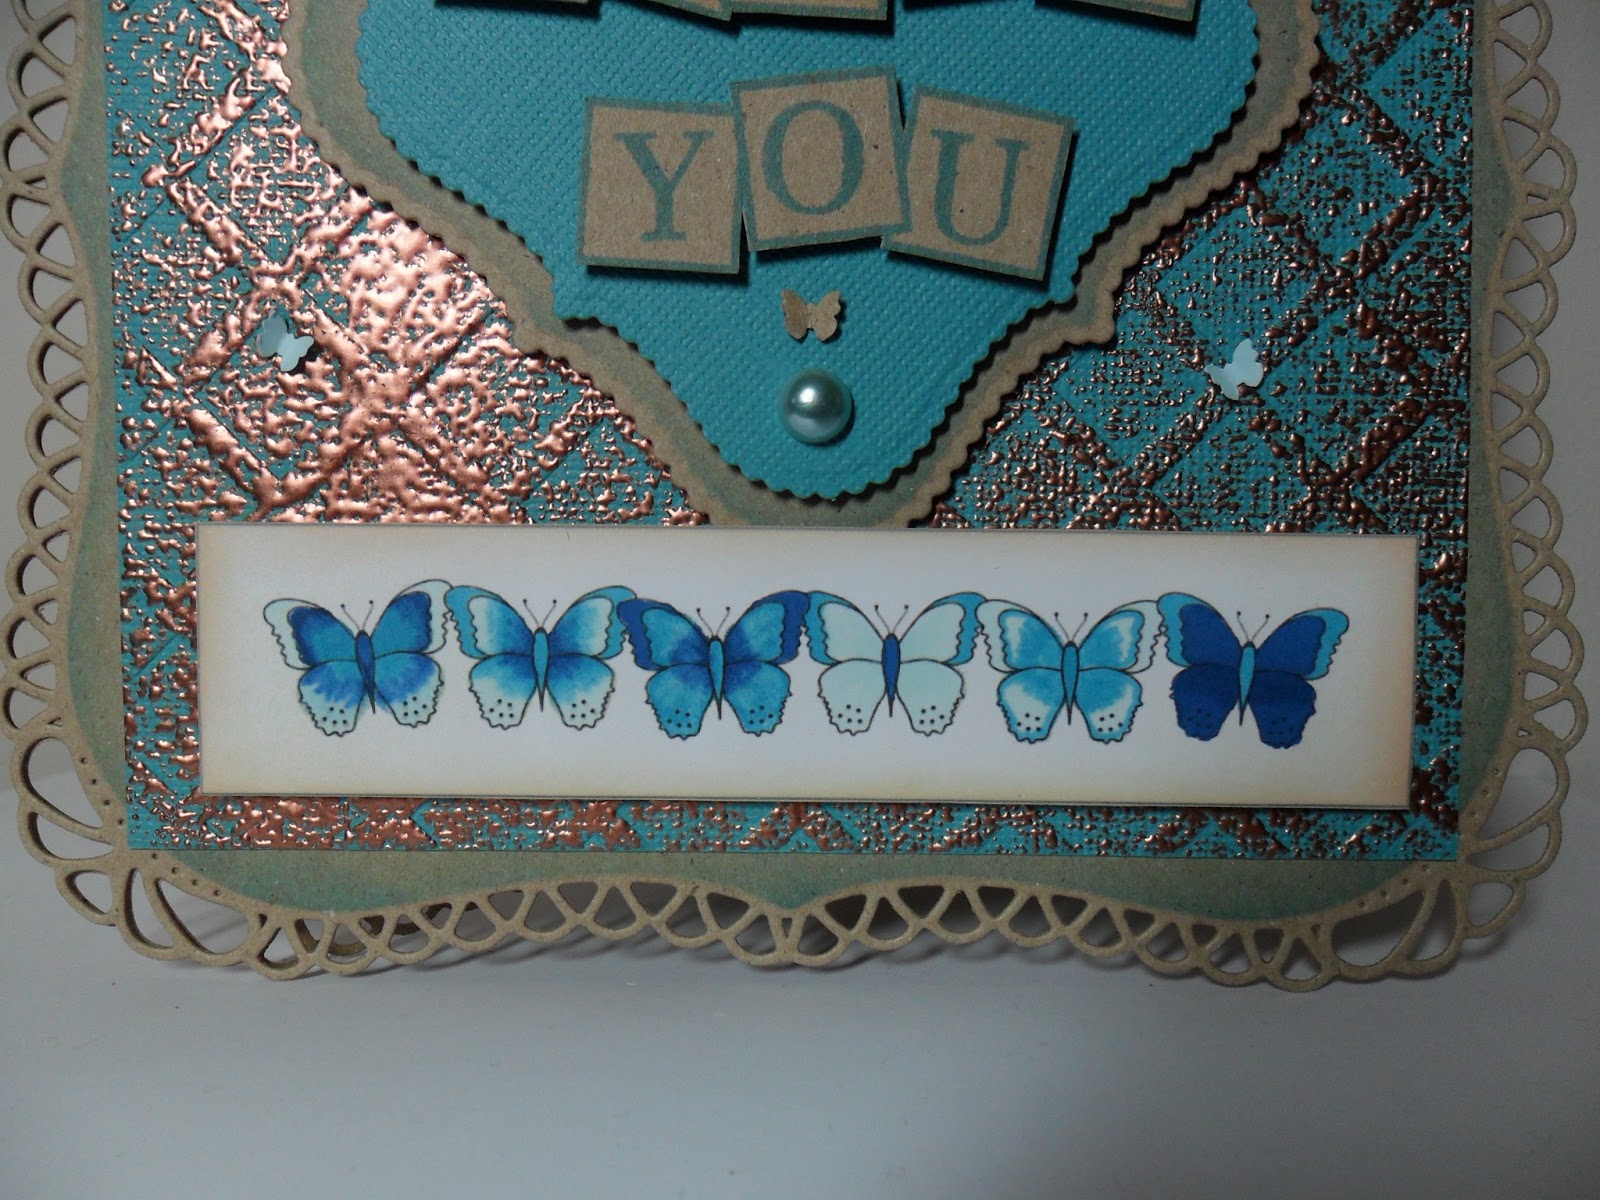

My base card was made from two of the Spellbinders Grand Decorative Labels One cut in kraft card.  I attached with the super stick red liner tape.  While still in the die I inked through with Tim Holtz Distress Ink in Broken China.  My main background was made with Coredinations cardstock.  I embossed using the lattice Embossalicious folder from Crafter's Companion and then lightly brushed a Versamark inkpad over the top.  I added Debbi Moore's metal magic and heated from behind with a heat tool.  I really like the effect that this has created.


My sentiment topper was created with Spellbinders Scalloped Labels One in kraft and Coredinations.  Using Claritystamp's Letterbox Alphabet set and Broken China Distress Ink I made the sentiment as I wanted.  The squares come as triple, double and single boxes so I after stamped the triple box, I masked it off and then used the double box stamp to create a five letter space for my wording.  Claritystamps really are the best quality I've ever had the pleasure to use.  My tiny butterflies were punched using a Tonic punch and I just coloured a piece of super smooth paper with the Aquamarine FlexMarker to get the perfect match.  The pearls came free from Create and Craft a while back.

I really hope to see you join us for our girly challenge this week.

Happy crafting,
Rachel x

I'd like to enter this card into the following challenge:-
Shelly's Images - Show Us What You Got

Wednesday, 13 February 2013

Fab'n'Funky Challenges #158 - What's Inside

Hi Crafty Friends,

It must be Wednesday as we have a brand new challenge for you at Fab'n'Funky Challenges.  We loved all of your romantic and heart projects last week - what a lot of love is going on in the world this week!  The winners and Top 3 are on the blog now so do take a look.

And now to let you in on our new challenge, we have the brilliant Beccy and she has chosen...

What's Inside

We would like to see the inside of your cards decorated.  You can decorate it in any way you like, just make sure there is something extra special in there for the recipient.

Our sponsor this week is one of my faves - Stamp Fairy.  You can click here to check out their fab designs.  The randomly picked winner will receive a $10 voucher to spend in the online store.

So, I bet you are wondering what I've created this week, so without further ado...


Isn't he cute?  This is Garden Goblins 1 from Stamp Fairy and you can find him here.  I took him into Serif and used the Cut Out Studio to cut away the main white part of the mushrooms.  I added a red polkadot background paper behind and then once printed out I fussy cut around with scissors and a craft knife.  I coloured using my ProMarkers and Flexmarkers in Satin, Almond, Dusky Pink, Cinnamon, Cocoa, Caramel, Burnt Umber, Lipstick Red, Ruby, Surf Blue, Aquamarine and Soft Aqua.  I hope you can see the shading.


My red layer is a piece of Coredinations cardstock which I distressed with my Tim Holtz paper distresser.  I embossed the mushroom frame from the Cuttlebug Freshly Picked set and then sanded back to reveal a bit more of the design.  My circle of clouds was made using a Darice folder and an X-Cut circle die.  I printed the blue and brown papers from Serif, recolouring using the colour picker tool.  My card blank is from Hunkydory and I used Antique Linen Distress Ink to age the edge. 


I layered up more of the papers that I had used on the front and then added a border of mushrooms.  This paper was also printed from Serif.  My mushroom die is by C.C. Designs and I've had it in my stash for ages but only just cut with it today.  I used a stamp set, with Tim Holtz Distress Ink in Fired Brick, that was a free gift from Create and Craft as part of my club membership.

I hope you can link up your creations this week.  The team have come up with some brilliant ideas to I hope you can visit them for some inspiration too.

Happy crafting,
Rachel x