Hello Crafters,
It's another exciting day - I have another post on the Hope-Chances blog as one of Elliott's Angels! This card was made using the Spellbinders Holly Tags set again but there is nothing Christmas in sight!
I started with a 7" card blank and cut the sentiment in matte silver card from the Spellbinders Sentiment Five set. The flowers were made from the oval insert of the Holly Tags set. I used the circle insert for the centre of the flowers and added ink by stenciling through the die. The colours were Salty Ocean, Squeezed Lemonade and Worn Lipstick from Tim Holtz Distress Ink range.
I shaped the petals with a flower shaping kit using a stylus and a rubber mat. The centres were popped up on a double set of 3D foam pads.
You'll see some exciting new Spellbinders on the Hope-Chances blog too so head on over for a sneak peek or pre-order the great new sets at the shop.
Happy Crafting,
Rachel x
Followers
Showing posts with label Tim Holtz Distress Ink. Show all posts
Monday, 12 October 2015
Sunday, 30 March 2014
Happy Mother's Day Card
Hi Everyone,
Happy Mother's Day to all the mums out there. Hope you've been pampered today. I visited my Mam this afternoon with a handmade card so I thought I would share it with you tonight. Warning - glitter has been used in the making of this card!!
I started with a handmade Centura Pearl cardblank scored on my Ultimate Pro. I added a layer of plain white card to start my layers. My main background was embossed with a Couture Creations embossing folder called Seedless Nouveau. I extended the pattern to fit the size of my card. The purple came from Tim Holtz Distress Ink in Dusty Concord.
The decorative circles were created using a JustRite die designed by Becca Feeken. She is one amazingly talented lady. Check out her blog here. I cut the Lacy Tiers die with the Spellbinders Standard Circles Large on double sided sticky sheet attached to white card. Once cut, I covered in Amethyst Shimmer Diamond Sparkles glitter. It is super fine and really sparkly and was also in the sale! Bargain!
My sentiment is from JustRite too and I used a Spellbinders Ribbon Banners LG die to cut it out. The stamp set is called Family Sentiments. I attached the centre die and banner with foam pads. Finally I finished off with four aurora borealis gems for the corners.
Happy crafting,
Rachel x
Happy Mother's Day to all the mums out there. Hope you've been pampered today. I visited my Mam this afternoon with a handmade card so I thought I would share it with you tonight. Warning - glitter has been used in the making of this card!!
I started with a handmade Centura Pearl cardblank scored on my Ultimate Pro. I added a layer of plain white card to start my layers. My main background was embossed with a Couture Creations embossing folder called Seedless Nouveau. I extended the pattern to fit the size of my card. The purple came from Tim Holtz Distress Ink in Dusty Concord.
The decorative circles were created using a JustRite die designed by Becca Feeken. She is one amazingly talented lady. Check out her blog here. I cut the Lacy Tiers die with the Spellbinders Standard Circles Large on double sided sticky sheet attached to white card. Once cut, I covered in Amethyst Shimmer Diamond Sparkles glitter. It is super fine and really sparkly and was also in the sale! Bargain!
My sentiment is from JustRite too and I used a Spellbinders Ribbon Banners LG die to cut it out. The stamp set is called Family Sentiments. I attached the centre die and banner with foam pads. Finally I finished off with four aurora borealis gems for the corners.
Happy crafting,
Rachel x
Tuesday, 4 February 2014
JustRite Challenge #113 Entry
Hello Crafters,
To make my background, I started with a piece of white card and inked up a circle die from the JustRite Doilies and Lace set in Versamark and stamped all over. After I heat set this I inked the entire piece with Tim Holtz Distress Ink in Evergreen Bough. Then it was back to the heat tool to dry off! Next I used the JustRite Sweet Lace background stamp with clear embossing powder. This encapsulated the teal ink. Finally I rubbed Black Soot Distress Ink all over. All that was left to do was to clean up over the original white circles. I layered up with black and white cardstock. I added interest with the new Spellbinders Borderabilities - A2 Bracket Borders Two at the base. My baker's twine and sentiment were my finishing touches. The sentiment is also JustRite, from their Grand Birthday Sentiments set and was inked with the Evergreen Bough again. Now for extreme close-up!
I meant to do a tutorial of this technique as I went along but I got too carried away and just crafted away! I'll put this up the next time I have my stamps and inks out. It takes a little patience but I think it's definitely worth it in the end.
Happy crafting,
Hope you haven't been having too much fun without me! I've been having a bit of a break from blogging but since we had a public holiday last week I thought I would take the chance to play. I've made a card for the current JustRite challenge which is all about backgrounds.
To make my background, I started with a piece of white card and inked up a circle die from the JustRite Doilies and Lace set in Versamark and stamped all over. After I heat set this I inked the entire piece with Tim Holtz Distress Ink in Evergreen Bough. Then it was back to the heat tool to dry off! Next I used the JustRite Sweet Lace background stamp with clear embossing powder. This encapsulated the teal ink. Finally I rubbed Black Soot Distress Ink all over. All that was left to do was to clean up over the original white circles. I layered up with black and white cardstock. I added interest with the new Spellbinders Borderabilities - A2 Bracket Borders Two at the base. My baker's twine and sentiment were my finishing touches. The sentiment is also JustRite, from their Grand Birthday Sentiments set and was inked with the Evergreen Bough again. Now for extreme close-up!
I meant to do a tutorial of this technique as I went along but I got too carried away and just crafted away! I'll put this up the next time I have my stamps and inks out. It takes a little patience but I think it's definitely worth it in the end.
Happy crafting,
Rachel x
I would like to enter this into the following challenge:-
JustRite Challenge #113 - Backgrounds
Wednesday, 27 November 2013
Fab'n'Funky Challenges #195 - Cute Critters
Hello Crafters,
Well after the excitement of our birthday celebrations at Fab'n'Funky Challenges, we would like to say THANK YOU to everyone who entered a card or project during the fortnight of Anything Goes. We had a lot of fun checking out the entries. The winners are all on the blog now so be our guest and take a peek!
The show must go on as they say and we are back with another great challenge. Ginny is our talented host and she has chosen a theme for all the animal lovers!
Well after the excitement of our birthday celebrations at Fab'n'Funky Challenges, we would like to say THANK YOU to everyone who entered a card or project during the fortnight of Anything Goes. We had a lot of fun checking out the entries. The winners are all on the blog now so be our guest and take a peek!
The show must go on as they say and we are back with another great challenge. Ginny is our talented host and she has chosen a theme for all the animal lovers!
CUTE CRITTERS
We would like to see animals on your projects - the cuter the better!
Our sponsor this week is the fabulous:-

Who are offering a fab prize of a $10 voucher to spend in
The StampFairy shop
I've mixed it up a bit this week! I haven't made a card but a hanger. When I saw this super cute image called Monkeys Bananas 1 from StampFairy I just knew it would be perfect for my cousin's little boy. My cousin would never be without her cuddly monkey when we were young so this totally fitted the bill for her son!
I started with my image and coloured him using ProMarkers in Summer Sun, Lemon, Primrose, Sand Dune, Cocoa, Cinnamon, March Hare and I dotted the Blender pen for texture. I cut out my image using Spellbinders Labels One and also cut one of these in kraft card. I used my guillotine to slice this in half and then punched two holes in each piece and four in my topper. I threaded the baker's twine through the three sections and secured in place with Cosmic Shimmer glue. The letters were cut out using Spellbinders Alphabet set and inked with Vintage Photo Distress Ink. The yellow card is Coredinations. Finally, I added my stars which came from American Crafts.
Here is a close up of the cute little guy!
I really hope you can join us for our Cute Critters challenge this week at Fab'n'Funky Challenges.
Happy crafting,
Rachel x
Saturday, 23 November 2013
Fab'n'Funky Challenges #194 - Birthday Challenge Reminder (Anything Goes)
Morning!
We are still celebrating turning 4 at Fab'n'Funky and the DT are back with more inspiration for our Anything Goes challenge. If you haven't done so already, head on over to the Fab'n'Funky Challenges blog to see our brilliant sponsors and what the team have created for you this time.
The challenge this week continues to be about as easy as it can get!
Anything Goes
Anything Goes
So play along! It may be you who will win one of the Prizes that we have on offer for you:
Our wonderful sponsors
and
Prizes
and
Prizes
Hello! My name is Joanna Munster, owner/designer/illustrator of Inspired by Stamping. I started crafting 12 1/2 years ago when I started capturing my daughter’s special moments with scrapbooking. I quickly fell in love with all things crafty including cross stitch, crocheting, knitting, drawing, jewelry making but my love has always been towards the paper crafty industry. It is a place where I can lose myself in creating for hours.
Three years ago, my hubby, myself and our three children moved from the United States to Australia. While waiting for my working visa, I started drawing and paper crafting full time with my blog. One of my dear friends suggested that I make a stamp set with one of my drawings and this is where Inspired by Stamping started.
We love every moment of working in this industry from the beautiful women and men that we meet daily, to the amazing and creative designs that we see when a friend uses an Inspired by Stamping set.
You as our customer will ALWAYS be our top priority! If you have any questions or if something is not right, please let us know. We will get back to you ASAP! Our email is customerservice@inspiredbystamping.com

Prize is 3 digis of the winner's choice
Prize - 5 digis of the winners Choice
- and a GDT spot at Fab'n'Funky Challenges
Prize is a class of the winner's choice
Prize is 3 digis of the winner's choice

Prize is 3 images of the winner's choice from the Lacy Sunshine Shop
For this reminder post I chose to use a Lili of the Valley image. I have loads of their gorgeous stamps but I decided to try out one of the new Art Pads. I chose a cute baby image from Art Pad 11 as my friend had a little boy on Tuesday. Well, maybe not so little at 8lb 10oz! Here is my card:
I started with an 8" cardblank and embossed the front using Sue Wilson's Basket Weave folder. I covered in Tim Holtz Distress Ink in Orange Marmalade. My topper, DCWV patterned paper and Coredinations were layered onto kraft card with my Perfect Layers tools. I inked around the edge of the main topper with the same Distress Ink and then used a micron pen to draw the faux stitching.
My sentiment banner was cut using Spellbinders Tags and Banners and I inked with is the Orange Marmalade DI too. I attached this and the topper with foam pads. My finishing touch was the wooden heart which came from American Crafts.
I really hope you can join in and party by linking up to Fab'n'Funky this week. You have until 8pm (UK time) on Tuesday 26 November. You've got to be in it to win it!
Happy crafting,
Rachel x
Wednesday, 2 October 2013
Fab'n'Funky Challenges #187 - Ribbon
Hi Crafters,
It's Wednesday again and that means a new challenge at Fab'n'Funky but first, head on over to the blog to see our winner from last week's button challenge. We loved your great designs.
Again I predict a lot of love for our challenge this week! The very talented Dawn is our host and she has chosen the theme of...
Simples! I don't think this one needs any explaining! Our sponsor this week is the wonderful Stamp Fairy. Check out their great designs here.
The DT were lucky to be able to use Stamp Fairy images for our projects this week and here is what I came up with using Mimi Falltime 5.
I made a 7" card blank and then embossed using an Embossaliscious embossing folder. I inked with Tim Holtz Distress Ink in Antique Linen. My hexagon paper came free with a magazine and I really love all the patterns. I added a piece of kraft crepe paper. My ribbon was coloured using a ProMarker in Wild Cranberry.
My image was coloured using ProMarkers in Blush, Walnut, Caramel, Pink Mittens, Rose Pink, Wild Cranberry, Apple Cider and Sandstone. I cut her out using the new Spellbinders dies Branching Out which launched at CHA in the summer. I also inked through the die with the Antique Linen to add depth and for dimension I added foam pads.
I really hope you'll add some ribbon to your project and join us this week at Fab'n'Funky Challenges.
Happy crafting,
Rachel x
It's Wednesday again and that means a new challenge at Fab'n'Funky but first, head on over to the blog to see our winner from last week's button challenge. We loved your great designs.
Again I predict a lot of love for our challenge this week! The very talented Dawn is our host and she has chosen the theme of...
Ribbon
Simples! I don't think this one needs any explaining! Our sponsor this week is the wonderful Stamp Fairy. Check out their great designs here.
The DT were lucky to be able to use Stamp Fairy images for our projects this week and here is what I came up with using Mimi Falltime 5.
I made a 7" card blank and then embossed using an Embossaliscious embossing folder. I inked with Tim Holtz Distress Ink in Antique Linen. My hexagon paper came free with a magazine and I really love all the patterns. I added a piece of kraft crepe paper. My ribbon was coloured using a ProMarker in Wild Cranberry.
My image was coloured using ProMarkers in Blush, Walnut, Caramel, Pink Mittens, Rose Pink, Wild Cranberry, Apple Cider and Sandstone. I cut her out using the new Spellbinders dies Branching Out which launched at CHA in the summer. I also inked through the die with the Antique Linen to add depth and for dimension I added foam pads.
I really hope you'll add some ribbon to your project and join us this week at Fab'n'Funky Challenges.
Happy crafting,
Rachel x
Wednesday, 21 August 2013
Fab'n'Funky Challenges #182 - You Can Stick It!
Hi Everyone,
We are back at Fab'n'Funky Challenges with a brand new challenge for you today. The winners from last time are also on the blog so head on over to find out who was lucky.
The talented and very kind Ciska is our host this week and we have a great challenge to help you use up some stash...
We would like you to use stickers on your project. They can be peel-offs, glitter stickers, word stickers or any other kind of sticker from your crafty bounty. Just make sure you tell us what you've used.
Our sponsor this week is the brilliant Bugaboo Digi Stamps. They have a stamp for every occasion and some really funny ones too.
The DT were lucky enough to work with fabulous Bugaboo images and I chose to work with the Silhouette Butterfly Flowers image which you can find here.
I started with a 6" square scalloped card blank and used a Cuttlebug embossing folder to create texture in the middle of the card. I inked this with Tim Holtz Distress Ink in Fired Brick to make it pop. My image was cut out using Spellbinders Picot Edge Circles. I simply threaded the ribbon through the holes created by the die and tied in a bow at the top. This is the first time I've used this technique but really liked the effect.
My stickers are ancient! They are glittery butterfly stickers from Anita's. I think I might have bought them from the DoCrafts website a few years ago but really can't remember.
I really hope you can join us to stick it this week.
Happy crafting,
Rachel x
We are back at Fab'n'Funky Challenges with a brand new challenge for you today. The winners from last time are also on the blog so head on over to find out who was lucky.
The talented and very kind Ciska is our host this week and we have a great challenge to help you use up some stash...
You Can Stick It!
We would like you to use stickers on your project. They can be peel-offs, glitter stickers, word stickers or any other kind of sticker from your crafty bounty. Just make sure you tell us what you've used.
Our sponsor this week is the brilliant Bugaboo Digi Stamps. They have a stamp for every occasion and some really funny ones too.

The DT were lucky enough to work with fabulous Bugaboo images and I chose to work with the Silhouette Butterfly Flowers image which you can find here.
I started with a 6" square scalloped card blank and used a Cuttlebug embossing folder to create texture in the middle of the card. I inked this with Tim Holtz Distress Ink in Fired Brick to make it pop. My image was cut out using Spellbinders Picot Edge Circles. I simply threaded the ribbon through the holes created by the die and tied in a bow at the top. This is the first time I've used this technique but really liked the effect.
My stickers are ancient! They are glittery butterfly stickers from Anita's. I think I might have bought them from the DoCrafts website a few years ago but really can't remember.
I really hope you can join us to stick it this week.
Happy crafting,
Rachel x
Wednesday, 29 May 2013
Fab'n'Funky Challenges #173 - One for the Girls
Hi Everyone,
We are back to Wednesday again and I'm not sure I like how fast this year seems to be going! I doubt it will slow down though!
Wednesday means a new challenge at Fab'n'Funky Challenges but it also means that the winners and Top 3 from last week have been chosen. All the details can be found over at on the F'n'F blog.
We have our blogging Mama as our host this week - the fabulous Judith. I love the theme this week as it it totally me! So without further ado our theme is...
Just make a female-themed project and link it up - couldn't be simpler! We have two sponsors this week too. My Creative Classroom and StampArt Design by Kathryne. Two sponsors means two winners so let's get crafting!
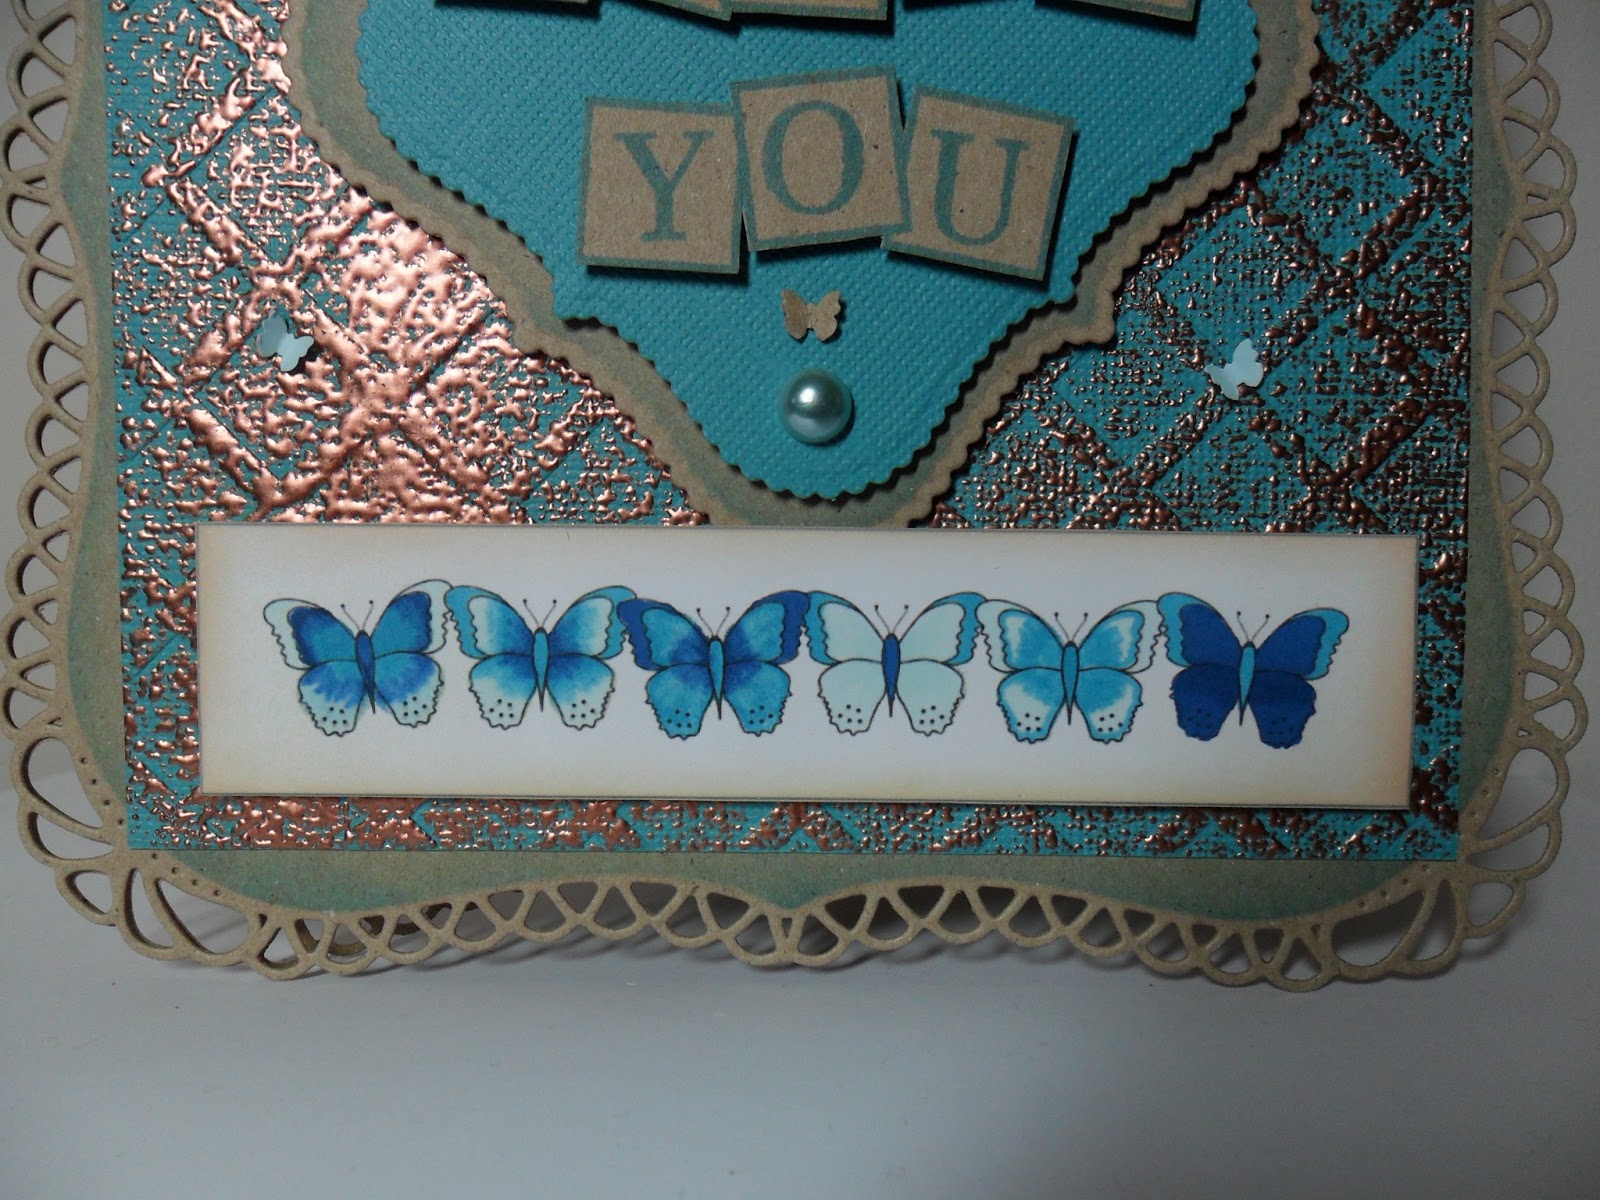
This is my card for the challenge - the girly elements are the butterflies, pearls and decorative edging.
I used a StampArt Design by Kathryne image for my card called Butterfly Border 1 and coloured with FlexMarkers in Aquamarine, Surf Blue and Navy Blue. I inked the edge with Tim Holtz Distress ink in Antique Linen for an aged effect.
My base card was made from two of the Spellbinders Grand Decorative Labels One cut in kraft card. I attached with the super stick red liner tape. While still in the die I inked through with Tim Holtz Distress Ink in Broken China. My main background was made with Coredinations cardstock. I embossed using the lattice Embossalicious folder from Crafter's Companion and then lightly brushed a Versamark inkpad over the top. I added Debbi Moore's metal magic and heated from behind with a heat tool. I really like the effect that this has created.
My sentiment topper was created with Spellbinders Scalloped Labels One in kraft and Coredinations. Using Claritystamp's Letterbox Alphabet set and Broken China Distress Ink I made the sentiment as I wanted. The squares come as triple, double and single boxes so I after stamped the triple box, I masked it off and then used the double box stamp to create a five letter space for my wording. Claritystamps really are the best quality I've ever had the pleasure to use. My tiny butterflies were punched using a Tonic punch and I just coloured a piece of super smooth paper with the Aquamarine FlexMarker to get the perfect match. The pearls came free from Create and Craft a while back.
I really hope to see you join us for our girly challenge this week.
Happy crafting,
Rachel x
I'd like to enter this card into the following challenge:-
Shelly's Images - Show Us What You Got
We are back to Wednesday again and I'm not sure I like how fast this year seems to be going! I doubt it will slow down though!
Wednesday means a new challenge at Fab'n'Funky Challenges but it also means that the winners and Top 3 from last week have been chosen. All the details can be found over at on the F'n'F blog.
We have our blogging Mama as our host this week - the fabulous Judith. I love the theme this week as it it totally me! So without further ado our theme is...
One for the Girls
Just make a female-themed project and link it up - couldn't be simpler! We have two sponsors this week too. My Creative Classroom and StampArt Design by Kathryne. Two sponsors means two winners so let's get crafting!
This is my card for the challenge - the girly elements are the butterflies, pearls and decorative edging.
I used a StampArt Design by Kathryne image for my card called Butterfly Border 1 and coloured with FlexMarkers in Aquamarine, Surf Blue and Navy Blue. I inked the edge with Tim Holtz Distress ink in Antique Linen for an aged effect.
My base card was made from two of the Spellbinders Grand Decorative Labels One cut in kraft card. I attached with the super stick red liner tape. While still in the die I inked through with Tim Holtz Distress Ink in Broken China. My main background was made with Coredinations cardstock. I embossed using the lattice Embossalicious folder from Crafter's Companion and then lightly brushed a Versamark inkpad over the top. I added Debbi Moore's metal magic and heated from behind with a heat tool. I really like the effect that this has created.
My sentiment topper was created with Spellbinders Scalloped Labels One in kraft and Coredinations. Using Claritystamp's Letterbox Alphabet set and Broken China Distress Ink I made the sentiment as I wanted. The squares come as triple, double and single boxes so I after stamped the triple box, I masked it off and then used the double box stamp to create a five letter space for my wording. Claritystamps really are the best quality I've ever had the pleasure to use. My tiny butterflies were punched using a Tonic punch and I just coloured a piece of super smooth paper with the Aquamarine FlexMarker to get the perfect match. The pearls came free from Create and Craft a while back.
I really hope to see you join us for our girly challenge this week.
Happy crafting,
Rachel x
I'd like to enter this card into the following challenge:-
Shelly's Images - Show Us What You Got
Subscribe to:
Posts (Atom)