Hi Crafters,
I'm back with another Christmas card! Shock horror! I was really itching to get going with my Christmas crafting and this card practically made itself! Although judging by the craftermath left behind, I think I had something to do with it!
Anyway, enough of my rambling and on to the card in question.
I started with Centura Pearl cardstock in royal blue and made my first layer. Next I embossed a piece of silver linen cardstock with a holly embossing folder from Crafter's Companion. For my main topper I heat embossed the JustRite Holly Swirls background stamp using Versamark and then added white detail embossing powder. I love the result. My bauble was cut using Spellbinders 2011 Heirloom Ornaments and then I stamped the sentiment from the JustRite Merry Wishes Vintage Labels Seven set and heat embossed that too.
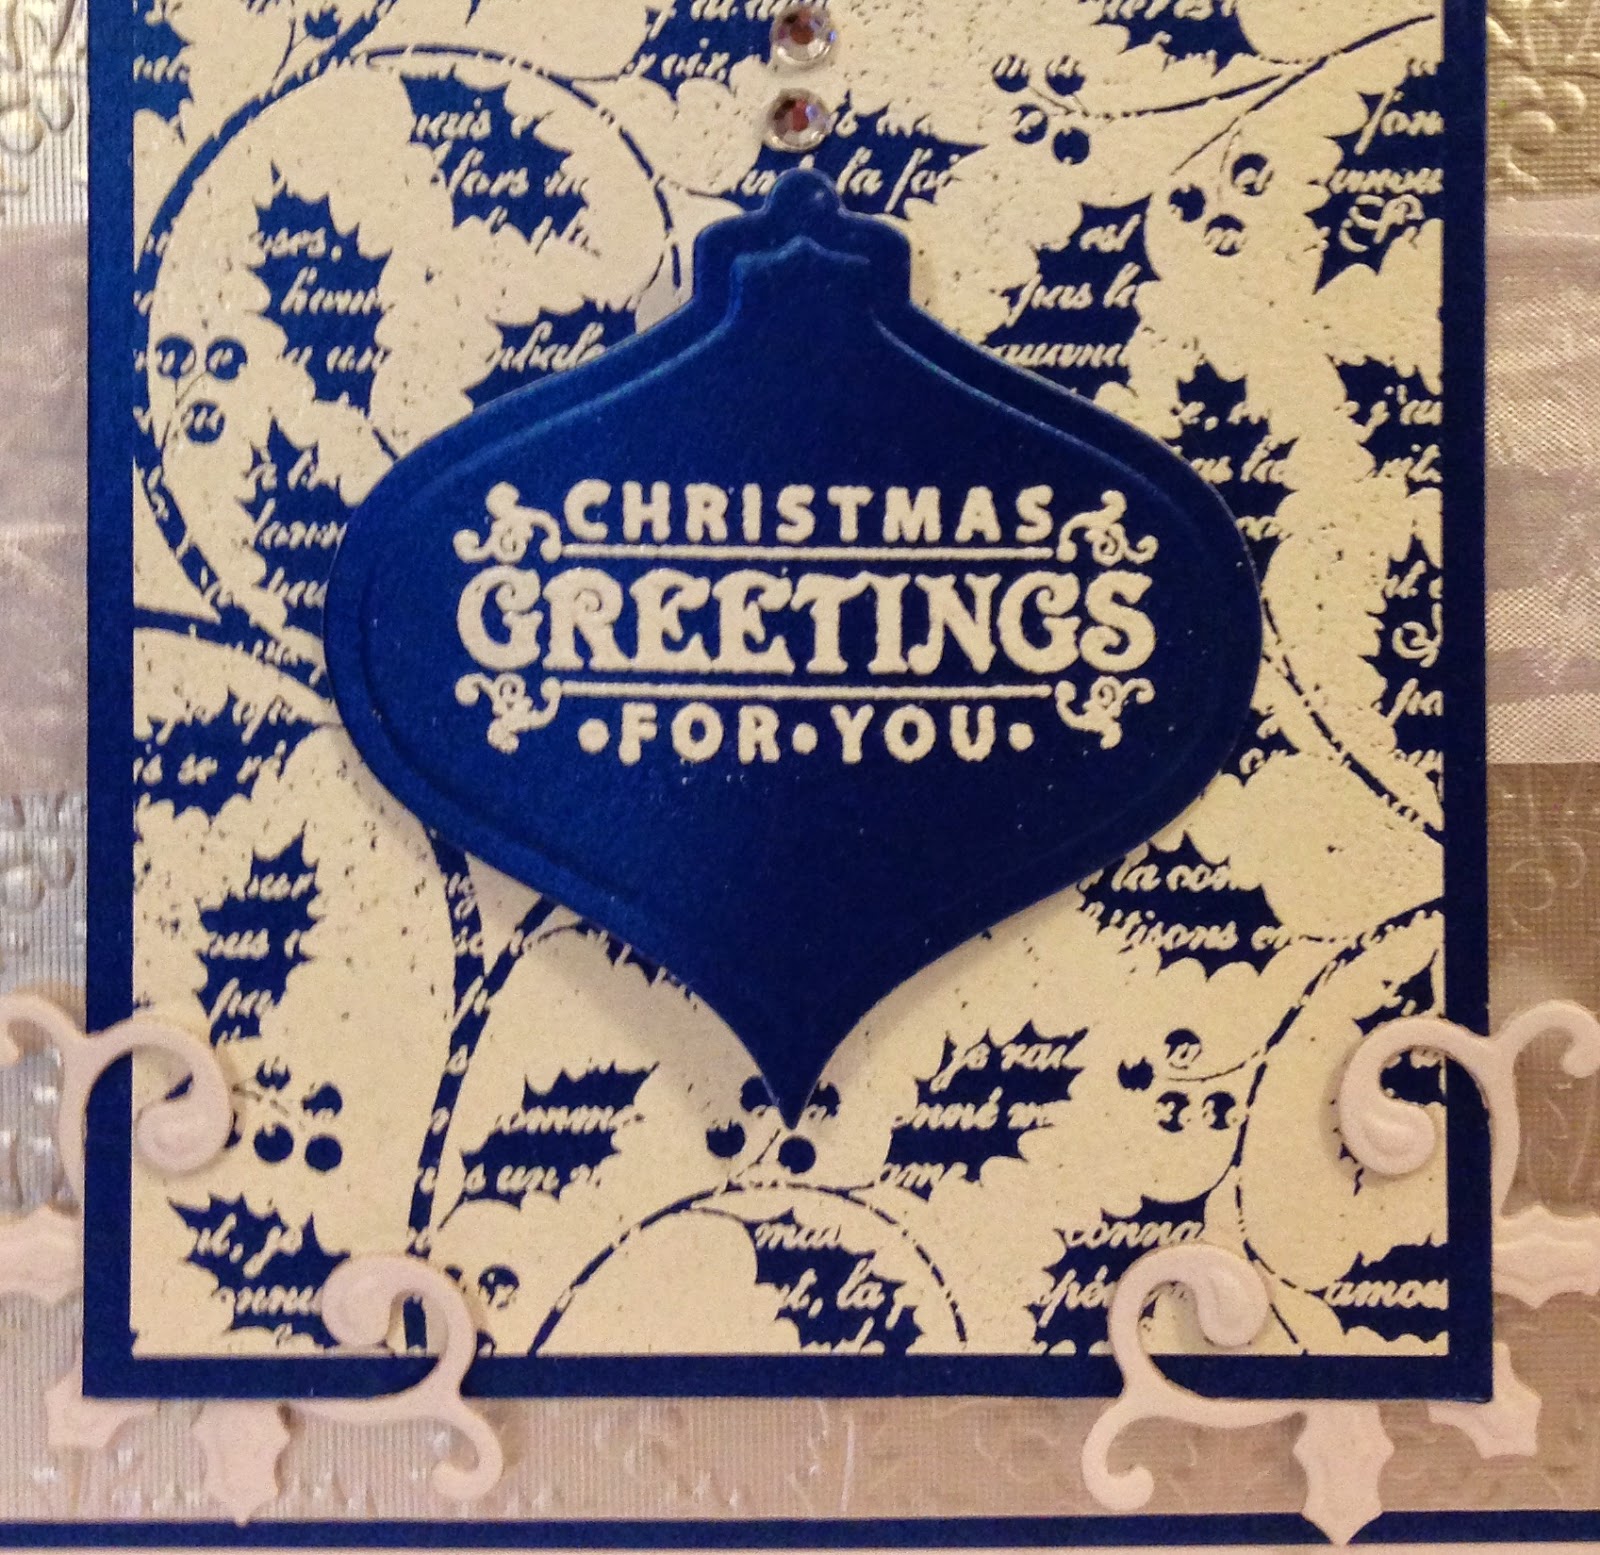
My corner dies came from the Spellbinders Holly Accents set and the ribbon is from Creative Expressions. Using a ruler for accuracy, I attached a line of faceted gems to create the string for the bauble, which was layered with two sets of foam pads to give dimension.
I would like to enter this card into the following challenge:
JustRite Challenge #125 - Non-Traditional Christmas
Happy crafting,
Rachel x
Followers
Showing posts with label Creative Expressions. Show all posts
Tuesday, 22 July 2014
Sunday, 30 March 2014
Happy Mother's Day Card
Hi Everyone,
Happy Mother's Day to all the mums out there. Hope you've been pampered today. I visited my Mam this afternoon with a handmade card so I thought I would share it with you tonight. Warning - glitter has been used in the making of this card!!
I started with a handmade Centura Pearl cardblank scored on my Ultimate Pro. I added a layer of plain white card to start my layers. My main background was embossed with a Couture Creations embossing folder called Seedless Nouveau. I extended the pattern to fit the size of my card. The purple came from Tim Holtz Distress Ink in Dusty Concord.
The decorative circles were created using a JustRite die designed by Becca Feeken. She is one amazingly talented lady. Check out her blog here. I cut the Lacy Tiers die with the Spellbinders Standard Circles Large on double sided sticky sheet attached to white card. Once cut, I covered in Amethyst Shimmer Diamond Sparkles glitter. It is super fine and really sparkly and was also in the sale! Bargain!
My sentiment is from JustRite too and I used a Spellbinders Ribbon Banners LG die to cut it out. The stamp set is called Family Sentiments. I attached the centre die and banner with foam pads. Finally I finished off with four aurora borealis gems for the corners.
Happy crafting,
Rachel x
Happy Mother's Day to all the mums out there. Hope you've been pampered today. I visited my Mam this afternoon with a handmade card so I thought I would share it with you tonight. Warning - glitter has been used in the making of this card!!
I started with a handmade Centura Pearl cardblank scored on my Ultimate Pro. I added a layer of plain white card to start my layers. My main background was embossed with a Couture Creations embossing folder called Seedless Nouveau. I extended the pattern to fit the size of my card. The purple came from Tim Holtz Distress Ink in Dusty Concord.
The decorative circles were created using a JustRite die designed by Becca Feeken. She is one amazingly talented lady. Check out her blog here. I cut the Lacy Tiers die with the Spellbinders Standard Circles Large on double sided sticky sheet attached to white card. Once cut, I covered in Amethyst Shimmer Diamond Sparkles glitter. It is super fine and really sparkly and was also in the sale! Bargain!
My sentiment is from JustRite too and I used a Spellbinders Ribbon Banners LG die to cut it out. The stamp set is called Family Sentiments. I attached the centre die and banner with foam pads. Finally I finished off with four aurora borealis gems for the corners.
Happy crafting,
Rachel x
Tuesday, 4 February 2014
JustRite Challenge #113 Entry
Hello Crafters,
To make my background, I started with a piece of white card and inked up a circle die from the JustRite Doilies and Lace set in Versamark and stamped all over. After I heat set this I inked the entire piece with Tim Holtz Distress Ink in Evergreen Bough. Then it was back to the heat tool to dry off! Next I used the JustRite Sweet Lace background stamp with clear embossing powder. This encapsulated the teal ink. Finally I rubbed Black Soot Distress Ink all over. All that was left to do was to clean up over the original white circles. I layered up with black and white cardstock. I added interest with the new Spellbinders Borderabilities - A2 Bracket Borders Two at the base. My baker's twine and sentiment were my finishing touches. The sentiment is also JustRite, from their Grand Birthday Sentiments set and was inked with the Evergreen Bough again. Now for extreme close-up!
I meant to do a tutorial of this technique as I went along but I got too carried away and just crafted away! I'll put this up the next time I have my stamps and inks out. It takes a little patience but I think it's definitely worth it in the end.
Happy crafting,
Hope you haven't been having too much fun without me! I've been having a bit of a break from blogging but since we had a public holiday last week I thought I would take the chance to play. I've made a card for the current JustRite challenge which is all about backgrounds.
To make my background, I started with a piece of white card and inked up a circle die from the JustRite Doilies and Lace set in Versamark and stamped all over. After I heat set this I inked the entire piece with Tim Holtz Distress Ink in Evergreen Bough. Then it was back to the heat tool to dry off! Next I used the JustRite Sweet Lace background stamp with clear embossing powder. This encapsulated the teal ink. Finally I rubbed Black Soot Distress Ink all over. All that was left to do was to clean up over the original white circles. I layered up with black and white cardstock. I added interest with the new Spellbinders Borderabilities - A2 Bracket Borders Two at the base. My baker's twine and sentiment were my finishing touches. The sentiment is also JustRite, from their Grand Birthday Sentiments set and was inked with the Evergreen Bough again. Now for extreme close-up!
I meant to do a tutorial of this technique as I went along but I got too carried away and just crafted away! I'll put this up the next time I have my stamps and inks out. It takes a little patience but I think it's definitely worth it in the end.
Happy crafting,
Rachel x
I would like to enter this into the following challenge:-
JustRite Challenge #113 - Backgrounds
Wednesday, 27 November 2013
Fab'n'Funky Challenges #195 - Cute Critters
Hello Crafters,
Well after the excitement of our birthday celebrations at Fab'n'Funky Challenges, we would like to say THANK YOU to everyone who entered a card or project during the fortnight of Anything Goes. We had a lot of fun checking out the entries. The winners are all on the blog now so be our guest and take a peek!
The show must go on as they say and we are back with another great challenge. Ginny is our talented host and she has chosen a theme for all the animal lovers!
Well after the excitement of our birthday celebrations at Fab'n'Funky Challenges, we would like to say THANK YOU to everyone who entered a card or project during the fortnight of Anything Goes. We had a lot of fun checking out the entries. The winners are all on the blog now so be our guest and take a peek!
The show must go on as they say and we are back with another great challenge. Ginny is our talented host and she has chosen a theme for all the animal lovers!
CUTE CRITTERS
We would like to see animals on your projects - the cuter the better!
Our sponsor this week is the fabulous:-

Who are offering a fab prize of a $10 voucher to spend in
The StampFairy shop
I've mixed it up a bit this week! I haven't made a card but a hanger. When I saw this super cute image called Monkeys Bananas 1 from StampFairy I just knew it would be perfect for my cousin's little boy. My cousin would never be without her cuddly monkey when we were young so this totally fitted the bill for her son!
I started with my image and coloured him using ProMarkers in Summer Sun, Lemon, Primrose, Sand Dune, Cocoa, Cinnamon, March Hare and I dotted the Blender pen for texture. I cut out my image using Spellbinders Labels One and also cut one of these in kraft card. I used my guillotine to slice this in half and then punched two holes in each piece and four in my topper. I threaded the baker's twine through the three sections and secured in place with Cosmic Shimmer glue. The letters were cut out using Spellbinders Alphabet set and inked with Vintage Photo Distress Ink. The yellow card is Coredinations. Finally, I added my stars which came from American Crafts.
Here is a close up of the cute little guy!
I really hope you can join us for our Cute Critters challenge this week at Fab'n'Funky Challenges.
Happy crafting,
Rachel x
Monday, 14 October 2013
A Beautiful Birthday
Hello All,
I have something a bit different for you today. I have finally tried out my gilding flakes! I must have bought my very first one pot about two years ago but have never had the guts to get them out and play. Well, after seeing Sue Wilson on the Tool Shed this month, I just knew it was time to get gilding. Oh what fun they are but boy do they go everywhere! I think my gluing technique could be improved but it wasn't too shabby for a first attempt! Anyway, I'm waffling and I'm sure you'd like to see the card in question so here goes!
I stared with a piece of black card and the Leafy Background Stamp from JustRite. I inked up my stamp with the Cosmic Shimmer Flake and Glitter Glue and then quickly pressed it onto the card. You have to be quick or the card will tear. I know this from experience - it only happened the second time though!
Once the glue was in position I cleaned my stamp under the tap and then left to air dry. This is an important step as you don't want the glue to dry on your stamp. I added the Cosmic Shimmer gilding flakes in Sunrise Dawn and rubbed clean with my scoochy sponge from IndigoBlu. For added texture I ran the piece of card through a Sizzix embossing folder which looks like a vintage sunrise. Sorry, I don't know the name of the folder.
Nearly all of my cardstock is from Creative Expressions but the gold card is from Create and Craft's own brand. I would love a large stock of this but I'm down to my last two sheets. Sob! I used my Ultimate Pro to make the card bland and then attached my topper with super sticky tape to the bottom part of the easel. The ribbon was from my stash and matched so well I just had to use it.
For the main sentiment I stamped using JustRite's Enjoy the Day Vintage Labels Four in Versamark and then heat embossing in gold. I cut out with scissors, leaving a tiny border of plain cardstock. My butterfly is from Spellbinders Les Papillion. The gems came from Create and Craft.
I would like to enter this card in to the following challenge:
Justrite Challenge #107 - Easel Cards
I hope you are all having a great start to your week. I have thoroughly enjoyed my playtime this evening and can't wait to start on my next project.
Happy crafting,
Rachel x
I have something a bit different for you today. I have finally tried out my gilding flakes! I must have bought my very first one pot about two years ago but have never had the guts to get them out and play. Well, after seeing Sue Wilson on the Tool Shed this month, I just knew it was time to get gilding. Oh what fun they are but boy do they go everywhere! I think my gluing technique could be improved but it wasn't too shabby for a first attempt! Anyway, I'm waffling and I'm sure you'd like to see the card in question so here goes!
I stared with a piece of black card and the Leafy Background Stamp from JustRite. I inked up my stamp with the Cosmic Shimmer Flake and Glitter Glue and then quickly pressed it onto the card. You have to be quick or the card will tear. I know this from experience - it only happened the second time though!
Once the glue was in position I cleaned my stamp under the tap and then left to air dry. This is an important step as you don't want the glue to dry on your stamp. I added the Cosmic Shimmer gilding flakes in Sunrise Dawn and rubbed clean with my scoochy sponge from IndigoBlu. For added texture I ran the piece of card through a Sizzix embossing folder which looks like a vintage sunrise. Sorry, I don't know the name of the folder.
Nearly all of my cardstock is from Creative Expressions but the gold card is from Create and Craft's own brand. I would love a large stock of this but I'm down to my last two sheets. Sob! I used my Ultimate Pro to make the card bland and then attached my topper with super sticky tape to the bottom part of the easel. The ribbon was from my stash and matched so well I just had to use it.
For the main sentiment I stamped using JustRite's Enjoy the Day Vintage Labels Four in Versamark and then heat embossing in gold. I cut out with scissors, leaving a tiny border of plain cardstock. My butterfly is from Spellbinders Les Papillion. The gems came from Create and Craft.
I would like to enter this card in to the following challenge:
Justrite Challenge #107 - Easel Cards
I hope you are all having a great start to your week. I have thoroughly enjoyed my playtime this evening and can't wait to start on my next project.
Happy crafting,
Rachel x
Wednesday, 11 September 2013
Fab'n'Funky Challenges #184 - Sweet Treats
Hi Crafters,
Well we are on Wednesday again and that means a brand new challenge at Fab'n'Funky. It is my turn to host this week and as we are sponsored by the fabulous Digi Darla Designs, I picked a foodie-related challenge
Sweet Treats
You can use cake, chocolate, sweets or even a fruity cocktail in your design. We would love for you to satisfy your sweet tooth with us!
The winner, picked by random.org, will receive 5 images of their choice from Digi Darla Designs.
Here is my card this week...
I used a pre-coloured image called Chocolate Cake from Digi Darla Designs and cut it out with my Spellbinders Romantic Rectangles. I inked through the die with Tim Holtz Distress Ink in Red Brick. My background paper is from DCWV and I embossed this with a Crafter's Companion Embossalicious folder. I added a piece of Coredinations in dark pink which was embossed with a "Happy Birthday" folder and then sanded back. The pearls came from Creative Expressions and my flowers were also from Crafter's Companion.
While I was thinking of my card design, I decided to make some sweet treats of my own and here is the end result - a chocolate cupcake with strawberry flavoured chocolate frosting. This is for the true chocoholic!
The cupcakes in the background are actually my kitchen wallpaper - I really do love cupcakes!
I really hope you can join us in our Sweet Treats challenge this week at Fab'n'Funky.
Happy crafting,
Rachel x
Wednesday, 4 September 2013
Fab'n'Funky Challenges #183 - Opposites Attract
Hi Everyone,
We are back at Fab'n'Funky Challenges today with a brand new challenge but before you get crafting to join in, why not check out the winners from last week. They are up on the blog right now.
Our challenge this week is hosted by the wonderful Alli and you can visit her blog here. Alli has chosen a great colour challenge:-
We would like you to use two opposite colours from the following colour wheel:-
We are back at Fab'n'Funky Challenges today with a brand new challenge but before you get crafting to join in, why not check out the winners from last week. They are up on the blog right now.
Our challenge this week is hosted by the wonderful Alli and you can visit her blog here. Alli has chosen a great colour challenge:-
Opposites Attract
We would like you to use two opposite colours from the following colour wheel:-
We also have two fabulous sponsors this week:-
and
I chose to use an image from StampArt Design by Kathryne called Butterfly Border 1. Along with the border image, you also receive an individual butterfly image which is what I used here.
You can probably guess by the photo which colours I chose! Yellow and purple just seemed to scream out at me "Pick me, pick me!" How could I refuse?!
My card blank was made using two cuts of the Spellbinders Fanciful Lattice in Centura pearl glued together on the left to create the spine. I printed the purple paper from a Creative Crafting World CD-ROM. To make the butterfly the vibrant shade of yellow I used My Craft Studio software. Once printed, I embossed the wings using a Cuttlebug swirl folder. I added glitter to the centre with a Quickie Glue Pen and attached with foam pads. My ribbon is really old so I have no idea where it came from but my pearls are from Creative Expressions.
I really hope you can make your opposites attract this week and join us at Fab'n'Funky Challenges.
Happy crafting,
Rachel x
Tuesday, 6 August 2013
JustRite Stamps in a Teacup!
Hi Everyone,
I have a new card to share with you today and it's my first entry into the JustRite Challenge blog. I just love their stamps and dies and have a small collection which has been building steadily. The current challenge has photo inspiration along with a designated colour palette.
And here is my card:
I think my photography skills have let me down on this one. I used the Cosmic Shimmer Lustre embossing powder in Pink Pearl which has a gorgeous sheen but this hasn't shown up very well through the photography.
I started with the JustRite French Rose background stamp and used Versamark on yellow pearlescent cardstock. I added the Cosmic Shimmer Lustre embossing powder and heated. I tore the edges of my card and then die cut the Spellbinders Tea Cup, adding the handle in matching cardstock. The doily was coloured with a ProMarker in Pink Mittens from the seasonal limited edition set from last year. My sentiment came from JustRite's All In The Family Large Sentiments set. This was also stamped with Versamark and heat embossed with the Lustre Powder. I coloured the seam binding with the Pink Mittens pen. My dazzler was added with Pinflair glue gel.
For the base card, I scored a piece of Centura Pearl cardstock in half using my Ultimate Pro and then embossed with one of Sue Wilson's embossing folders. To finish the background, I cut and embossed the corners from Spellbinders' Botanical Swirls and Accents set.
Happy crafting,
Rachel x
I would like to enter this card into the following challenges:
JustRite Challenge #102 - Colour Inspiration
Sweet Pea Stampers - Embossing (Wet or Dry)
I have a new card to share with you today and it's my first entry into the JustRite Challenge blog. I just love their stamps and dies and have a small collection which has been building steadily. The current challenge has photo inspiration along with a designated colour palette.
And here is my card:
I think my photography skills have let me down on this one. I used the Cosmic Shimmer Lustre embossing powder in Pink Pearl which has a gorgeous sheen but this hasn't shown up very well through the photography.
I started with the JustRite French Rose background stamp and used Versamark on yellow pearlescent cardstock. I added the Cosmic Shimmer Lustre embossing powder and heated. I tore the edges of my card and then die cut the Spellbinders Tea Cup, adding the handle in matching cardstock. The doily was coloured with a ProMarker in Pink Mittens from the seasonal limited edition set from last year. My sentiment came from JustRite's All In The Family Large Sentiments set. This was also stamped with Versamark and heat embossed with the Lustre Powder. I coloured the seam binding with the Pink Mittens pen. My dazzler was added with Pinflair glue gel.
For the base card, I scored a piece of Centura Pearl cardstock in half using my Ultimate Pro and then embossed with one of Sue Wilson's embossing folders. To finish the background, I cut and embossed the corners from Spellbinders' Botanical Swirls and Accents set.
Happy crafting,
Rachel x
I would like to enter this card into the following challenges:
JustRite Challenge #102 - Colour Inspiration
Sweet Pea Stampers - Embossing (Wet or Dry)
Wednesday, 24 July 2013
Fab'n'Funky Challenges #180 - Make a Set
Hi Everyone,
We are back at Fab'n'Funky Challenges with a great new challenge. Be sure to head over to the blog to check out our winners from the Christmas in July challenge though. They are just waiting to be seen!
On to this week's challenge which is hosted by the wonderful Shirley who is a fab cake decorator too. She has chosen a brilliant challenge to get those creative juices flowing!
We are back at Fab'n'Funky Challenges with a great new challenge. Be sure to head over to the blog to check out our winners from the Christmas in July challenge though. They are just waiting to be seen!
On to this week's challenge which is hosted by the wonderful Shirley who is a fab cake decorator too. She has chosen a brilliant challenge to get those creative juices flowing!
Make a Set
That's right this week we would love to see you make a set of cards, maybe a card and a matching tag or envelope. You could make a gift box with a matching card and tag.
This week you have three times the luck of winning a wonderful prize as we have three wonderful sponsors - Doodle Pantry, StampArt Design by Kathryne and Digital Delights. Just click on their names to see their super designs.
I chose to work with an image from Doodle Pantry and when I came across "Oh Baby" I knew it would be perfect. I have so many friends who are expecting babies this year! Must be something in the water!
I made a set of four cards all using the pre-coloured yellow baby bottle from Doodle Pantry and some yellow gingham paper from Craft Artist 2 Professional.
I chose to use blue and pink card blanks for to differentiate the boys and girls cards. I also added embossing and die cutting to each to help tie them together. The folders I used were from Crafter's Companion Embossalicious range. I created the die cuts with Spellbinders Grand Splendid Circles, Labels One and Labels Eight and the "baby" was cut with a Provo Craft die. My stamps came from a set I received free from Create and Craft for being a club member.
Here they are one by one...
As you'll see I used my X-Cut corner rounder punch on two of the cards and added some pretty pearls to the girly cards.
As we are in our summer season, this challenge will run for two weeks so you have until 6 August to post your entry.
Happy crafting,
Rachel x
Wednesday, 3 July 2013
Fab'n'Funky Challenges #178 - Anything but Square
Hi Everyone,
I'm Back! We all had a lovely time at my brother's wedding. The family came from all over the UK - London, Glasgow, Moffat, Alford, Forres, Aberdeen, Perth and Comrie. It was brilliant to see everyone again and the photos will be a great keepsake.
I'm sure you are all waiting to hear about the new challenge over at Fab'n'Funky but first we have announced our winner and Top 3 from last week. Just head over to the blog to take a peak.
We have the wonderful Angelique as our host this week and she has picked a great challenge to inspire you...
That's right - we don't want to see any squares this week! Just so long as your project isn't square, feel free to it link up. We also have two great sponsors - Digi Darla Designs and StampArt Design by Kathryne. Take a look at their designs by clicking on the links. You won't be disappointed.
As we are into wedding season I have chosen to use the Tall Wedding Couple image from Digi Darla Designs as the focus of my card.
I used Spellbinders Grand Labels Twenty Three for my base card and then embossed through one of the Creative Expression folders designed by Sue Wilson. I think this one is called Cascading Hearts. To add definition to the edge of the card, I inked very lightly with Tim Holtz Distress Ink in Dusty Concord. This is barely noticeable in the photo but does show up better in real life.
My image was coloured with ProMarkers in Blossom, Almond, Black, Marsh Green and all the Cool Greys. I also inked the edge with Dusty Concord. My flowers are from Wild Orchid Crafts and I've had them for over a year but have been loathe to use them as they are so pretty! I think I've made up for it here! Finally I added my sentiment which is from a really old Hunkydory kit. It was a little too pink so I went over with the Dusty Concord here too.
I really hope you'll join us this week - just leave those squares at home!
Happy crafting,
Rachel x
I'm Back! We all had a lovely time at my brother's wedding. The family came from all over the UK - London, Glasgow, Moffat, Alford, Forres, Aberdeen, Perth and Comrie. It was brilliant to see everyone again and the photos will be a great keepsake.
I'm sure you are all waiting to hear about the new challenge over at Fab'n'Funky but first we have announced our winner and Top 3 from last week. Just head over to the blog to take a peak.
We have the wonderful Angelique as our host this week and she has picked a great challenge to inspire you...
Anything but Square
That's right - we don't want to see any squares this week! Just so long as your project isn't square, feel free to it link up. We also have two great sponsors - Digi Darla Designs and StampArt Design by Kathryne. Take a look at their designs by clicking on the links. You won't be disappointed.
As we are into wedding season I have chosen to use the Tall Wedding Couple image from Digi Darla Designs as the focus of my card.
I used Spellbinders Grand Labels Twenty Three for my base card and then embossed through one of the Creative Expression folders designed by Sue Wilson. I think this one is called Cascading Hearts. To add definition to the edge of the card, I inked very lightly with Tim Holtz Distress Ink in Dusty Concord. This is barely noticeable in the photo but does show up better in real life.
My image was coloured with ProMarkers in Blossom, Almond, Black, Marsh Green and all the Cool Greys. I also inked the edge with Dusty Concord. My flowers are from Wild Orchid Crafts and I've had them for over a year but have been loathe to use them as they are so pretty! I think I've made up for it here! Finally I added my sentiment which is from a really old Hunkydory kit. It was a little too pink so I went over with the Dusty Concord here too.
I really hope you'll join us this week - just leave those squares at home!
Happy crafting,
Rachel x
Wednesday, 12 June 2013
Fab'n'Funky Challenges #175 - Birthday
Hi Crafters,
It's Wednesday again and that means a new challenge at Fab'n'Funky but first, head on over to the blog to see our winner from last week's fruity challenge. We loved your great designs.
I predict a lot of love for our challenge this week! The very talented Dawn is our host and she has chosen the theme of...
Simples! I don't think this one needs any explaining! Our sponsor is the totally awesome Mayzyart and the DT were so lucky to work with her fab images. I used Maurine with Tea for my card.
I started with a piece of Coredinations cardstock and I embossed this several times to extend the pattern with an embossing folder that I received free with the last Crafter's Companion magazine. I really like the flower and dotty patchwork pattern. To reveal the core I sanded back using the Crafter's Companion Coredinations Accessory Kit. The lilac ribbon was on sale at Hobbycraft a few years back and this is the first time I've used it.
I used Creative Expressions crinkle paper for the bottom and then added half a doily coloured using the Twilight Sky ProMarker. My cup was made from Spellbinders Tea Cups and I stamped the sentiment with Momento Tuxedo Black ink. The gems were affixed by hand using Cosmic Shimmer dries clear glue.
I coloured Maurine with ProMarkers in Blush, Dusky Pink, Caramel, Cocoa, Henna, Ruby, Lipstick Red, Indigo Blue, Reef Blue, Twilight Sky, Polar Blue, Amethyst, Peony and Lilac. I cut down some Hunkydory foam pads to attach her to my card. I finished by adding some glitter to make stream from the tea cup.
I really hope you'll join us this week to celebrate someone's birthday. The more the merrier!
Happy crafting,
Rachel x
It's Wednesday again and that means a new challenge at Fab'n'Funky but first, head on over to the blog to see our winner from last week's fruity challenge. We loved your great designs.
I predict a lot of love for our challenge this week! The very talented Dawn is our host and she has chosen the theme of...
Birthday
Simples! I don't think this one needs any explaining! Our sponsor is the totally awesome Mayzyart and the DT were so lucky to work with her fab images. I used Maurine with Tea for my card.
I started with a piece of Coredinations cardstock and I embossed this several times to extend the pattern with an embossing folder that I received free with the last Crafter's Companion magazine. I really like the flower and dotty patchwork pattern. To reveal the core I sanded back using the Crafter's Companion Coredinations Accessory Kit. The lilac ribbon was on sale at Hobbycraft a few years back and this is the first time I've used it.
I used Creative Expressions crinkle paper for the bottom and then added half a doily coloured using the Twilight Sky ProMarker. My cup was made from Spellbinders Tea Cups and I stamped the sentiment with Momento Tuxedo Black ink. The gems were affixed by hand using Cosmic Shimmer dries clear glue.
I coloured Maurine with ProMarkers in Blush, Dusky Pink, Caramel, Cocoa, Henna, Ruby, Lipstick Red, Indigo Blue, Reef Blue, Twilight Sky, Polar Blue, Amethyst, Peony and Lilac. I cut down some Hunkydory foam pads to attach her to my card. I finished by adding some glitter to make stream from the tea cup.
I really hope you'll join us this week to celebrate someone's birthday. The more the merrier!
Happy crafting,
Rachel x
Wednesday, 8 May 2013
Fab'n'Funky Challenges #170 - Use beads
Hello All,
I hope you are all well and carrying on crafting! We had a morning of glorious sunshine yesterday and then as soon as I put my washing out, the mist came down! Typical!
Fab'n'Funky Challenges are back with another challenge for you but first why not head over to the blog to see our random winners and Top 4 from last week. We were all pinked out!
I'm your host this week and I've gone slightly out of the box with my theme...
You can use beads in any way you like and there is wonderful inspiration from my teamies on the Fab'n'Funky Challenges blog. They have really done me proud this week.
We have the brilliant Digi Darla Designs as our sponsor. Click here to view their amazing artwork. The DT were so lucky to be able to work with Digi Darla Designs images this week and I chose to use Dandelion Spray.
I'm really pleased with how my card turned out and it is winging it's way to Comrie in Perthshire for my aunty's birthday. I really hope she doesn't pop in for a look before it arrives!
I started by making a Spellbinders Grand Labels Twenty Three shaped card blank and then cut a piece of the Teresa Collins Fabrications teal paper using the same die, making an aperture using one of the smaller dies of the same shape. I took a piece of co-ordinating paper from the same kit and covered with a double sided sticky sheet. I then attached microbeads all over. This is the first time I've used microbeads and I think they are really cool.
I printed my digi using Super Smooth Decoupage paper and cut again with Spellbinders Grand Labels Twenty Three. I used a Quickie Glue Pen and MCS glitter for the flower heads. My beads in the centre were recycled from old jewellery and I attached with Cosmic Shimmer dries clear glue.
Finally I added my bow using silky crush ribbon and a piece of recycled satin ribbon, topping with a Creative Expressions dazzler.
Once I had made my card, I started on the box for that added wow factor! I used Centura Pearl cardstock and made a box using the Boxer board with the Crafter's Companion Ultimate Pro. Using the leftover piece from the frame of the card, I made a topper for my box. The sentiment was computer generated and finshed off with some more ribbon.
This is a photo that I took on my phone without my Ottlite on and was just astounded by the microbeads!
Thanks for stopping by today. I really hope you can join us for our beading challenge.
Happy crafting,
Rachel x
I would like to enter this card into the following challenges:-
Creative Card Crew #35 - Bling
Let's Craft and Create #69 - One for the Girls
Whimsical Designs - Bling it Out
Designs by Lisa Somerville - A Female Touch
Allsorts #205 - Add Some Sparkle
Deep Ocean Challenge Blog #51 - Sparkle
The ABC Challenge Blog - M for Make it Sparkle
I hope you are all well and carrying on crafting! We had a morning of glorious sunshine yesterday and then as soon as I put my washing out, the mist came down! Typical!
Fab'n'Funky Challenges are back with another challenge for you but first why not head over to the blog to see our random winners and Top 4 from last week. We were all pinked out!
I'm your host this week and I've gone slightly out of the box with my theme...
Use Beads
You can use beads in any way you like and there is wonderful inspiration from my teamies on the Fab'n'Funky Challenges blog. They have really done me proud this week.
We have the brilliant Digi Darla Designs as our sponsor. Click here to view their amazing artwork. The DT were so lucky to be able to work with Digi Darla Designs images this week and I chose to use Dandelion Spray.
I'm really pleased with how my card turned out and it is winging it's way to Comrie in Perthshire for my aunty's birthday. I really hope she doesn't pop in for a look before it arrives!
I started by making a Spellbinders Grand Labels Twenty Three shaped card blank and then cut a piece of the Teresa Collins Fabrications teal paper using the same die, making an aperture using one of the smaller dies of the same shape. I took a piece of co-ordinating paper from the same kit and covered with a double sided sticky sheet. I then attached microbeads all over. This is the first time I've used microbeads and I think they are really cool.
I printed my digi using Super Smooth Decoupage paper and cut again with Spellbinders Grand Labels Twenty Three. I used a Quickie Glue Pen and MCS glitter for the flower heads. My beads in the centre were recycled from old jewellery and I attached with Cosmic Shimmer dries clear glue.
Finally I added my bow using silky crush ribbon and a piece of recycled satin ribbon, topping with a Creative Expressions dazzler.
Once I had made my card, I started on the box for that added wow factor! I used Centura Pearl cardstock and made a box using the Boxer board with the Crafter's Companion Ultimate Pro. Using the leftover piece from the frame of the card, I made a topper for my box. The sentiment was computer generated and finshed off with some more ribbon.
This is a photo that I took on my phone without my Ottlite on and was just astounded by the microbeads!
Thanks for stopping by today. I really hope you can join us for our beading challenge.
Happy crafting,
Rachel x
I would like to enter this card into the following challenges:-
Creative Card Crew #35 - Bling
Let's Craft and Create #69 - One for the Girls
Whimsical Designs - Bling it Out
Designs by Lisa Somerville - A Female Touch
Allsorts #205 - Add Some Sparkle
Deep Ocean Challenge Blog #51 - Sparkle
The ABC Challenge Blog - M for Make it Sparkle
Friday, 22 March 2013
Pearly Thank You
Hi All,
Another day, another card! I really should be making wedding invites but this just came to me last night and I had to make it there and then. It's another Spellbinders card and I have used kraft cardstock again.
After pink, turquoise is definitely my next favourite colour. The turquoise colour on this card is from Coredinations cardstock. I stared with an 8x8 piece and attached to my card blank with double sided sticky tape. My main layer is kraft cardstock which I embossed with an Embossalicious embossing folder that I had inked with Versamark on the debossed side. I ran it through the Grand Calibur and then covered in white embossing powder before heating with my heat tool. I inked around the edge with Broken China Distress Ink from Tim Holtz. My ribbon is Creative Expressions Silky Crush in gold and Ribbon Kings sheer ribbon in turquoise.
I used the Spellbinders Grand Decorative Ovals for my base topper and inked again with the DI. The pearls, from Creative Expressions, were all in one but I cut in half and then added on top. I used the Spellbinders Standard Ovals Large in Coredinations and kraft for the next layers and stamped the same Thank You sentiment stamp in Broken China again.
I hope you have lovely plans for the weekend. I'm sure it'll be Monday before we know it!
Happy crafting,
Rachel x
Another day, another card! I really should be making wedding invites but this just came to me last night and I had to make it there and then. It's another Spellbinders card and I have used kraft cardstock again.
After pink, turquoise is definitely my next favourite colour. The turquoise colour on this card is from Coredinations cardstock. I stared with an 8x8 piece and attached to my card blank with double sided sticky tape. My main layer is kraft cardstock which I embossed with an Embossalicious embossing folder that I had inked with Versamark on the debossed side. I ran it through the Grand Calibur and then covered in white embossing powder before heating with my heat tool. I inked around the edge with Broken China Distress Ink from Tim Holtz. My ribbon is Creative Expressions Silky Crush in gold and Ribbon Kings sheer ribbon in turquoise.
I used the Spellbinders Grand Decorative Ovals for my base topper and inked again with the DI. The pearls, from Creative Expressions, were all in one but I cut in half and then added on top. I used the Spellbinders Standard Ovals Large in Coredinations and kraft for the next layers and stamped the same Thank You sentiment stamp in Broken China again.
I hope you have lovely plans for the weekend. I'm sure it'll be Monday before we know it!
Happy crafting,
Rachel x
Tuesday, 26 February 2013
The Cuttlebug Spot DT Projet - Sweet Like Chocolate
Hi All,
We are back at The Cuttlebug Spot with another great challenge for you. But first, thanks to all the great entries for last week - you were all as Cute as A Button!
Now I know you are wondering what challenge we have for you this week. It's a scrumptious one!
We would like to see you use chocolate in some way - you could use a chocolatey image, chocolate cardstock or even make a chocolate wrapper. And this is what I've done this week.
Before you all think I've lost the plot colourwise - this is the favourite colour combo of the recipient. My friend's daughter invited me to her cupcake making party on Saturday night and I knew I wanted to take her a little something and this is what I came up with.
I started with a piece of orange cardstock and wrapped tightly around the chocolate bar secring at hte back with super stick red liner tape. I used my Cuttlebug to cut the Spellbinders Floral Doily Accents border to make the borders in green. Finally I aded the tag, cut with Spellbinders Framed Tags One and then stamped using the ClarityStamp Letterbox Alphabet kit. The A is for Alyssa. I love that name. I attached the little tag with some baker's twine from Creative Expresssions.
We had so much fun making the cupcakes on Saturday night and I'm only sad that I never took a picture to show you all. The girls did a fab job of decorating.
I hope you can join in with our chocolatey challenge this week. The winner will receive a mystery prize from the DT.
Happy crafting,
Rachel x
We are back at The Cuttlebug Spot with another great challenge for you. But first, thanks to all the great entries for last week - you were all as Cute as A Button!
Now I know you are wondering what challenge we have for you this week. It's a scrumptious one!
Sweet Like Chocolate
We would like to see you use chocolate in some way - you could use a chocolatey image, chocolate cardstock or even make a chocolate wrapper. And this is what I've done this week.
Before you all think I've lost the plot colourwise - this is the favourite colour combo of the recipient. My friend's daughter invited me to her cupcake making party on Saturday night and I knew I wanted to take her a little something and this is what I came up with.
I started with a piece of orange cardstock and wrapped tightly around the chocolate bar secring at hte back with super stick red liner tape. I used my Cuttlebug to cut the Spellbinders Floral Doily Accents border to make the borders in green. Finally I aded the tag, cut with Spellbinders Framed Tags One and then stamped using the ClarityStamp Letterbox Alphabet kit. The A is for Alyssa. I love that name. I attached the little tag with some baker's twine from Creative Expresssions.
We had so much fun making the cupcakes on Saturday night and I'm only sad that I never took a picture to show you all. The girls did a fab job of decorating.
I hope you can join in with our chocolatey challenge this week. The winner will receive a mystery prize from the DT.
Happy crafting,
Rachel x
Tuesday, 12 February 2013
The Cuttlebug Spot Valentine's Blog Hop
Hi Everyone,
It's here! Today is day for The Cuttlebug Spot Valentine's Blog Hop. We will be hopping all week long!
I hope you are all excited to hop with us. We have some amazing inspiration from the DT and we would love to see your creations too. So, let us begin. All you have to do is visit each of the blogs of the DT, following the list in green below, give us a follow and comment on our Blog Hop post and then link up using the usual linky after the main post on The Cuttlebug Spot blog. We have great prizes this week too so make sure you are in it to win it!
This is my card for our Valentine's Blog Hop...
It's here! Today is day for The Cuttlebug Spot Valentine's Blog Hop. We will be hopping all week long!

I hope you are all excited to hop with us. We have some amazing inspiration from the DT and we would love to see your creations too. So, let us begin. All you have to do is visit each of the blogs of the DT, following the list in green below, give us a follow and comment on our Blog Hop post and then link up using the usual linky after the main post on The Cuttlebug Spot blog. We have great prizes this week too so make sure you are in it to win it!
This is my card for our Valentine's Blog Hop...
Not a traditional colour scheme but I hope that you all see the message I was trying to portray - you are the key to my heart. I started with some gorgeous gold matt cardstock and used my Spellbinders Grand Scalloped Squares to make a card blank. I added a layer of brown pearlescent cardstock and then embossed a piece of the gold cardstock using my Cuttlebug with the Couture Creations Without a Lock embossing folder. This is a new folder that also came with a great mini cogs embossing folder called Replacements.
For my top layer, I ran an X-Cut die through my Cuttlebug to create an aperature and then added some Creative Expressions silky crush ribbon in gold. My sentiment topper came from the new Spellbinders Framed Tags One set, also cut on my Cuttlebug. I embossed with gold embossing powder and heated with my heat tool. The stamp actually has tiny hearts within the lettering but it hasn't really shown up with the heat embossing. The key was cut using my new Silhouette Portrait. It is so clever and easy to use. I just need another three days a week to be able to play some more!
Now then, on to the Blog Hop sequence...
Rachel (you are here)
Andy
I really hope you can join in with us on our blog hop. Don't forget, your next stop is Andy. The prizes are really something this week.
Happy crafting,
Rachel x
Wednesday, 5 December 2012
Fab'n'Funky #150 - Non-Traditional Christmas
Hi Crafties,
Well, we are all partied out over on Fab'n'Funky - well maybe not quite yet. Christmas is coming! Thank you to everyone who joined us for our birthday fortnight. We loved your projects and what a difficult job picking the Top 3. But choose we did and the lucky winners are up on the blog right now. Check them out at Fab'n'Funky Challenges.
We have a Christmassy challenge for you this week...
So you can use non-traditional colours or a non-traditional image. We have two sponsors this week - My Creative Classroom and Stamp Fairy. Who both have a fab prize for our lucky winners.
Here is my inspiration...
Loads of layers on this one. I started by making an A5 card blank by scoring on my Ultimate Pro. I layered up pink pearlescent cardstock and then a sheet of patterned glitter paper from Creata. My border is made up from brown pearlescent cardstock and light pink glitter card. My ribbon is from Creative Expressions.
I used Spellbinders 2012 Heirloom Ornaments for the baubles. My sentiment stamp is from Polka Doodles and came free with a magazine a while back. I inked through the white bauble with Tim Holtz Distress Ink in Spun Sugar. I curved my baubles on the edge of my table and then mounted with foam tape. Finally I added three gems to the top left corner.
I hope you can join us for our Christmassy challenge this week. Can't wait to see what is in store for us!
Happy Crafting,
Rachel x
Well, we are all partied out over on Fab'n'Funky - well maybe not quite yet. Christmas is coming! Thank you to everyone who joined us for our birthday fortnight. We loved your projects and what a difficult job picking the Top 3. But choose we did and the lucky winners are up on the blog right now. Check them out at Fab'n'Funky Challenges.
We have a Christmassy challenge for you this week...
Non-Traditional Christmas
So you can use non-traditional colours or a non-traditional image. We have two sponsors this week - My Creative Classroom and Stamp Fairy. Who both have a fab prize for our lucky winners.
Here is my inspiration...
Loads of layers on this one. I started by making an A5 card blank by scoring on my Ultimate Pro. I layered up pink pearlescent cardstock and then a sheet of patterned glitter paper from Creata. My border is made up from brown pearlescent cardstock and light pink glitter card. My ribbon is from Creative Expressions.
I used Spellbinders 2012 Heirloom Ornaments for the baubles. My sentiment stamp is from Polka Doodles and came free with a magazine a while back. I inked through the white bauble with Tim Holtz Distress Ink in Spun Sugar. I curved my baubles on the edge of my table and then mounted with foam tape. Finally I added three gems to the top left corner.
I hope you can join us for our Christmassy challenge this week. Can't wait to see what is in store for us!
Happy Crafting,
Rachel x
Subscribe to:
Posts (Atom)


