Followers

Showing posts with label Crafter's Companion. Show all posts

Tuesday, 9 June 2015

Rock On!

Hello Crafters!  

I'm back!  I never really left the land of craft, just the land of blogging!  Today, I'd like to share something brand new for me - colouring I'm proud to show off!  I took the plunge and purchased the Chameleon Pens from Create and Craft a couple of months ago.  This was my first proper practice image and I love how easy the pens blend.  I used Sketch Saturday's current sketch for the layout.  


My image is from Mo's Digital Pencil and is called Jamming Janice - she's so cool.  You can find her here.  I cut her out with a Tattered Lace die and mounted onto DCWV glitter cardstock.  I used a Simon Says Stamp die to make the star pattern underneath my image.  The sentiment is a new die from Crafter's Companion's Only Words Collection.  

Happy crafting,
Rachel x

I would like to enter this card into the following challenges:-

Sketch Saturday - #364
Sweet Stampin' - Something Old, Something New (old papers, new dies)
Stamping Sensations - Dies and Punches

Tuesday, 22 July 2014

Christmas in July!

Hi Crafters,

I'm back with another Christmas card!  Shock horror!  I was really itching to get going with my Christmas crafting and this card practically made itself!  Although judging by the craftermath left behind, I think I had something to do with it!

Anyway, enough of my rambling and on to the card in question.


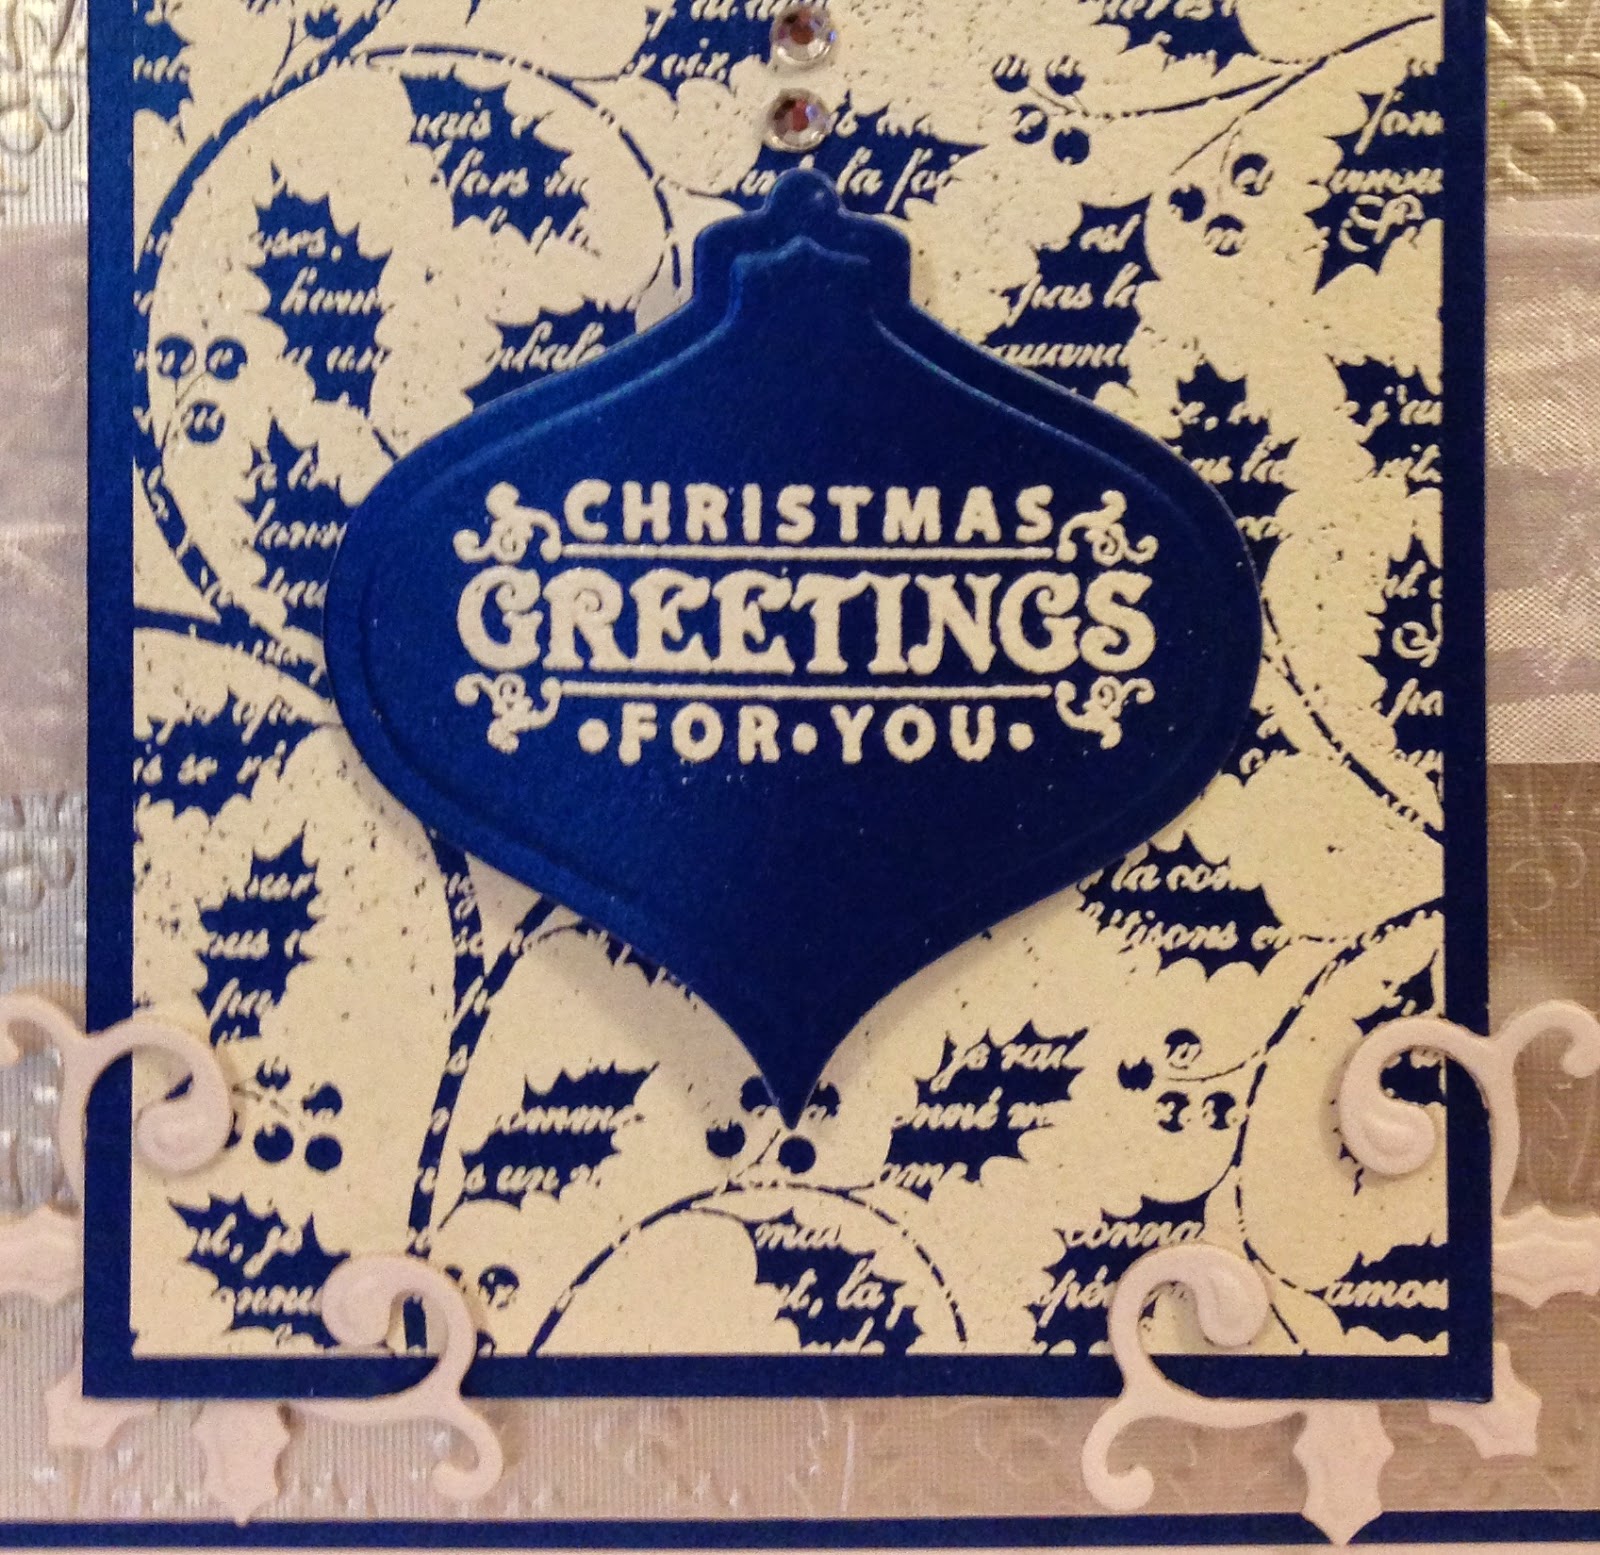
I started with Centura Pearl cardstock in royal blue and made my first layer.  Next I embossed a piece of silver linen cardstock with a holly embossing folder from Crafter's Companion.  For my main topper I heat embossed the JustRite Holly Swirls background stamp using Versamark and then added white detail embossing powder.  I love the result.  My bauble was cut using Spellbinders 2011 Heirloom Ornaments and then I stamped the sentiment from the JustRite Merry Wishes Vintage Labels Seven set and heat embossed that too.  


My corner dies came from the Spellbinders Holly Accents set and the ribbon is from Creative Expressions.  Using a ruler for accuracy, I attached a line of faceted gems to create the string for the bauble, which was layered with two sets of foam pads to give dimension.  

I would like to enter this card into the following challenge:
JustRite Challenge #125 - Non-Traditional Christmas

Happy crafting,
Rachel x

Tuesday, 6 August 2013

JustRite Stamps in a Teacup!

Hi Everyone,

I have a new card to share with you today and it's my first entry into the JustRite Challenge blog.  I just love their stamps and dies and have a small collection which has been building steadily.  The current challenge has photo inspiration along with a designated colour palette.


And here is my card:


I think my photography skills have let me down on this one.  I used the Cosmic Shimmer Lustre embossing powder in Pink Pearl which has a gorgeous sheen but this hasn't shown up very well through the photography.


I started with the JustRite French Rose background stamp and used Versamark on yellow pearlescent cardstock.  I added the Cosmic Shimmer Lustre embossing powder and heated.  I tore the edges of my card and then die cut the Spellbinders Tea Cup, adding the handle in matching cardstock.  The doily was coloured with a ProMarker in Pink Mittens from the seasonal limited edition set from last year.  My sentiment came from JustRite's All In The Family Large Sentiments set.  This was also stamped with Versamark and heat embossed with the Lustre Powder.  I coloured the seam binding with the Pink Mittens pen.  My dazzler was added with Pinflair glue gel.  


For the base card, I scored a piece of Centura Pearl cardstock in half using my Ultimate Pro and then embossed with one of Sue Wilson's embossing folders.  To finish the background, I cut and embossed the corners from Spellbinders' Botanical Swirls and Accents set.  

Happy crafting,
Rachel x

I would like to enter this card into the following challenges:

JustRite Challenge #102 - Colour Inspiration
Sweet Pea Stampers - Embossing (Wet or Dry)

Wednesday, 12 June 2013

Fab'n'Funky Challenges #175 - Birthday

Hi Crafters,

It's Wednesday again and that means a new challenge at Fab'n'Funky but first, head on over to the blog to see our winner from last week's fruity challenge.  We loved your great designs.

I predict a lot of love for our challenge this week!  The very talented Dawn is our host and she has chosen the theme of...


Birthday

Simples!  I don't think this one needs any explaining!  Our sponsor is the totally awesome Mayzyart and the DT were so lucky to work with her fab images.  I used Maurine with Tea for my card.


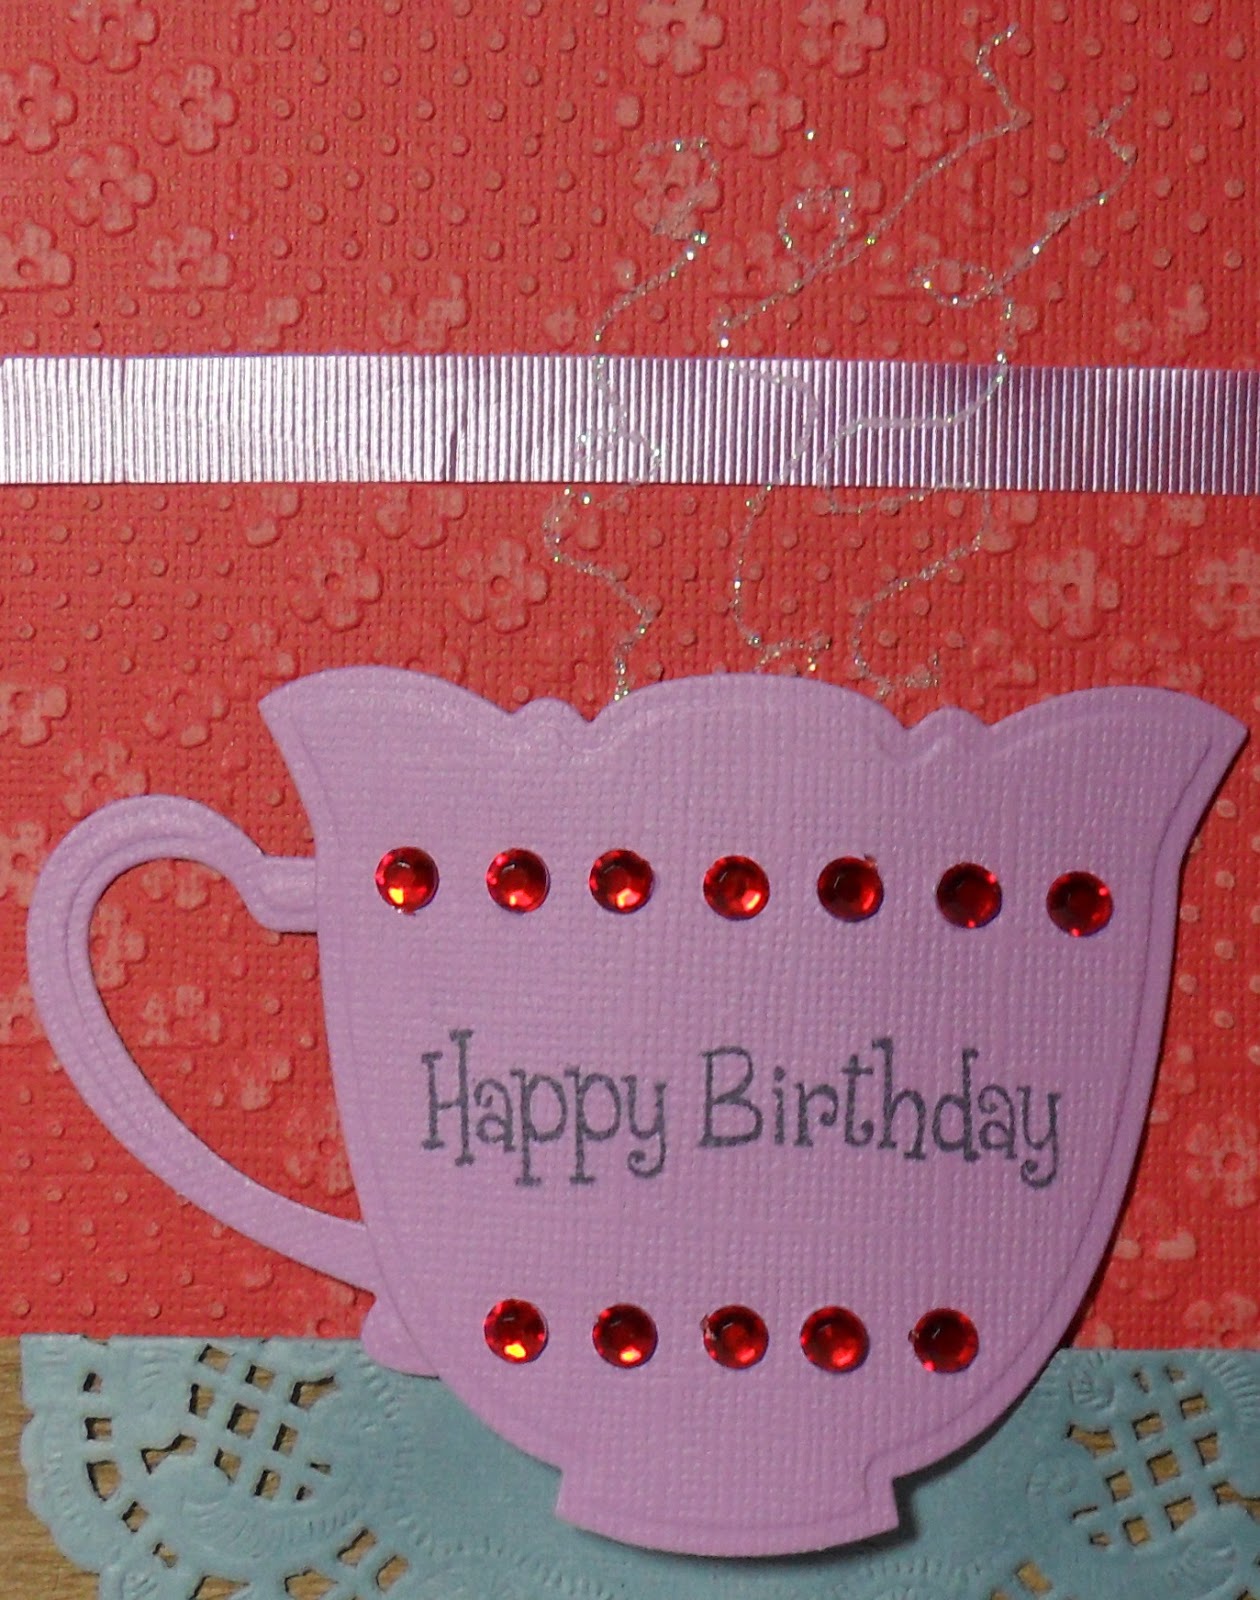
I started with a piece of Coredinations cardstock and I embossed this several times to extend the pattern with an embossing folder that I received free with the last Crafter's Companion magazine.  I really like the flower and dotty patchwork pattern.  To reveal the core I sanded back using the Crafter's Companion Coredinations Accessory Kit.  The lilac ribbon was on sale at Hobbycraft a few years back and this is the first time I've used it.  

I used Creative Expressions crinkle paper for the bottom and then added half a doily coloured using the Twilight Sky ProMarker.  My cup was made from Spellbinders Tea Cups and I stamped the sentiment with Momento Tuxedo Black ink.  The gems were affixed  by hand using Cosmic Shimmer dries clear glue.  


I coloured Maurine with ProMarkers in Blush, Dusky Pink, Caramel, Cocoa, Henna, Ruby, Lipstick Red, Indigo Blue, Reef Blue, Twilight Sky, Polar Blue, Amethyst, Peony and Lilac.  I cut down some Hunkydory foam pads to attach her to my card.  I finished by adding some glitter to make stream from the tea cup.


I really hope you'll join us this week to celebrate someone's birthday.  The more the merrier!

Happy crafting,
Rachel x

Friday, 22 March 2013

Butterfly Delight

Hi Friends,

I'm back with another card and if anyone was watching Ideal World last night you might have seen a sneaky peek!  When I saw all the wonderful embossed cards on the Crafter's Companion Embossalicious Pick of the Day show at 9pm I set about making one of my own!  I emailed in on the 11pm show and they showed it on air!  Mega cheesy grin!  So without further ado, here is the card in question...


Funnily enough I've used the same colours as our current challenge on Fab'n'Funky Challenges - pink, green and brown.  Head on over to the blog to see my teamies inspiration.  We have a great prize from MayzyArt too.

My base is a piece of pink Centrua Pearl cardstock.  I used an 8x8 Embossalicious folder on kraft card for the next layer and it is such a pretty flourish design.  Must use this more often!  My green doilies were cut using a Cheery Lynn die called French Pastry.  The green paper is from the Garden Fairies CD-ROM set by Debbi Moore.  I cut two of the Spellbinders Decagons for my main topper and then added a butterfly from the Spellbinders Les Papillion Two set.  My clear gems are from Create and Craft.  Finally my sentiment is stamped in black and I actually bought this stamp from ebay.  I was really impressed with the quality.  Another great bargain! 


Hope you are all having a great week.  I've totally blown my crafty budget this month with all the great deals on Create and Craft.  Oops!  I can't wait for the post man to bring them to my door.  Has anyone else bought any new goodies lately?  I'd love to see what you've made.

Happy crafting,
Rachel x

Challenges entered:
Cheery Lynn Designs Challenge Blog #72 - Think Spring
My Creative Time - Tic Tac Toe (top line - use a die, embossing and bling)
The Perfect Sentiment PSC71 - Fairies or Butterflies

Tuesday, 19 February 2013

The Cuttlebug Spot DT Card - Cute as a Button

Hello Everyone,

Phew, what a blog hop at The Cuttlebug Spot last week!  I hope you enjoyed hopping to all of your blogs.  Thanks so much to everyone for the lovely comments and follows. 

We've got a fantastic new challenge for you this week.  Our theme is...

Cute as a Button

We would love you feature a button on your project and tell us how you used your Cuttlebug.  Here is my inspiration...


I started with 6" scalloped card blank from Anita's.  I made my papers by using the colour picker tool in Craft Artist 2 Professional.  My image is produced by Hunkydory for Crafter's Companion and is from the Angelic and Friends range.  As soon as I saw this collection, I knew I had to add it to my basket!  Just as well Create and Craft had it on such a good deal! 


My harlequin cardstock is also from the paper kit.  I cut this with Spellbinders Grand Decorative Circles in the smallest size as it fits perfectly through the Cuttlebug.  Using Spellbinders Standard Circles, I cut a layer for my topper.  The vertical strip of paper was passed through a paper crimper to create texture.  I bought the ribbon a few years ago from Hobbycraft and it's from DoCrafts' Papermania range.  My finishing touch was to add my buttons and I used Spellbinders Sewing Elements to cut them.

I would like to enter this card into the following challenges:
Milk Coffee - Make It Cute
Crafty Ribbons Challenge #39 - Button Up
A Gem of a Challenge - Dies and Punches

Be sure to check out my teamies creations.  Hope you can join in our challenge this week.

Happy crafting,
Rachel x

Sunday, 1 July 2012

First Christmas Card of 2012

Yes, you read right!  I've started my Christmas crafting very early this year.  Well, early for me.  Last year I was still sticking things together on Christmas Eve!  Although I did have a half finished kitchen in my living room where I craft!


Enough of my babbling and on to the card itself...


I've started with a 8" scalloped card this year.  I used Nigel May's A-May-Zing Craft Into Christmas CD-ROM to print the backing paper, ribbon border, topper and sentiment.  Nigel produced the CD in conjunction with Crafter's Companion and it really is a must have for your Christmas projects.  I printed off about 10 sheets and then remembered that I had only looked at the first CD!  Brilliant!

I covered my card blank with the blue snowflake paper and then cut around the scallops with a craft knife on a glass cutting mat.  I added my ribbon border with a tape runner and then trimmed the edges.  The topper is mounted on a piece of Cor'dinations cardstock that I cut with a square die and my Grand Calibur.  You can't really tell from the photo but I have also decoupaged my snowman with foam pads.  My sentiment is mounted onto the same green Cor'dinations cardstock.

The snowflakes came from Spellbinders Create-A-Flake Three, Create-A-Flake Four and 2012 Snowflake Pendant.  I added glitter with my Quickie Glue pen and used MCS ultra fine glitter. 


I'm not sure that this photo really shows up the glitter but I added a little to each snowflake.  To finish off I added some faux stitching around the edge of the scallops with a black fine liner pen.

I would like to enter this card into the following challenges:


Happy Christmas crafting,
Rachel